Published on: 08/09/2023 · Last updated on: 23/09/2025
Know your way around the Zoom interface
This article covers some of the key settings and roles you may encounter during a Zoom meeting.
Breakout Rooms
It is quick and easy to create breakout rooms during a meeting as Host. Only the Host of the meeting can create breakout rooms, but alternative hosts and co-hosts can move between breakout rooms during the session and help manage them during the session. There are two options to create breakout rooms during the meeting.
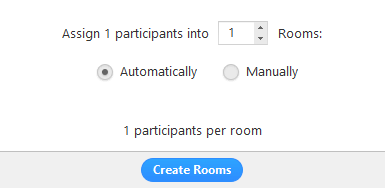
Automatically: You can set the number of rooms required and Zoom automatically assigns students into those rooms. You can subsequently move students into another room if required.
Manually: You can stipulate the number of rooms required, and manually assign students into those rooms.
You can also pre-assign students to Breakout Rooms. To learn more please read Zoom – Scheduling a Meeting. Detailed guidance on managing breakout rooms can be found on Zoom’s Website.
Please note that if you choose Assign Automatically to create Breakout Rooms, late joiners to the meeting will not be automatically assigned and will need to be assigned manually.
Similarly, any participant who leaves the meeting and later re-joins the meeting will not be automatically re-assigned to their previous group. Participants will need to know what group they were previously in if they want to be manually assigned back to the same group.
There are a number of breakout rooms options that you can configure during the meeting, these include:
- Allow Participants to choose room: This lets students choose which breakout room they move to and move between rooms.
- Move all participants into breakout rooms automatically: Checking this option will move all participants into the breakout rooms automatically. If this option is unchecked, the participants will need to click Join to be added to the breakout room.
- Allow participants to return to the main session at any time: If this option is checked, the participants can move back to the main session from their meeting controls. If this is disabled, they need to wait for the host to end the breakout rooms.
- Breakout rooms close automatically after x minutes:If this option is checked, the breakout rooms will automatically end after the configured time.
- Notify me when the time is up: If this option is checked, the host will be notified when the breakout room time is up.
- Countdown after closing breakout rooms: If this option is checked, the participants will be given a countdown of how much time they have left before being returned to the main room.
Additionally, participants will only be able to unmute themselves, chat, and share screen in breakout rooms IF the hosts enables this from main room’s Security settings. Hosts should consider amending these settings when moving to/from breakout rooms, to allow collaboration between students whilst maintaining order in the main meeting.
E.g. You are hosting a meeting with multiple activities, and want the participants to be Automatically Assigned to a different set of groups for the different activities. After the first activity…
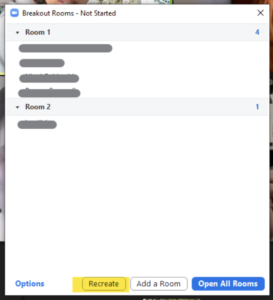
To reshuffle the participants into a new group:
Before you open the breakout room the second time you will need to click Recreate.
You will then need to ensure that Assign automatically is chosen before again clicking Recreate.
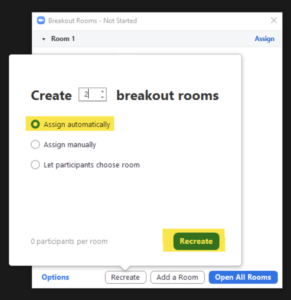
The participants will now be assigned to different groups.
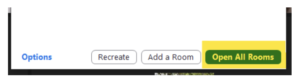
You can then Open All Rooms.
During a breakout room session, the Host can broadcast a message to all breakout rooms at once (e.g. “Please return to the main room in 10 minutes”). Detailed guidance is on Zoom’s website.
Currently, it is not possible to record breakout rooms.
Hosts – Different hosting roles
Zoom meetings will have always exactly one Host at any time. However you can have co-hosts and alternative hosts. Below is a table going over the different hosting roles and their permissions:
| Host | Co-Host | Alternative Host | Scheduling Privilege |
|---|---|---|---|
| – CAN start a meeting. – CAN start and manage breakout rooms. – CAN create and edit polls. – CAN promote participants to Co-Host. – CAN end a meeting for all participants. | – CAN have multiple Co-Host in a meeting. – Any participant can be made a Co-Host. – CANNOT start a meeting. – CANNOT create and edit a poll, but can start a poll. – CANNOT promote another participant to Co-Host. | – CAN start a meeting. – Will be meeting host if the original host is not present; however, meeting recordings will be saved to the scheduled host’s folder. – If scheduled host joins the meeting after the alternative host, the alternative host will lose hosting capabilities. – Will NOT see the meeting listed in Zoom. – CANNOT schedule a meeting on behalf of the Host. | – CAN schedule a meeting on behalf of a Host (as long as both have logged onto Zoom previously via SSO). |
As you can have co-hosts and alternative hosts, there are a few implications to consider when setting up additional hosts. These are illustrated in the following scenario:
Person A schedules the meeting as the host, Person B is set as an alternative host in the meeting setup.
- The first person to the meeting will become the host. If Person B starts the meeting they become the host (and so are able to start breakout rooms, create polls). If Person A joins after the alternative host, the original host will always regain control of the meeting and become host. In addition, the alternative host will change roles and become a normal participant.
- There is a maximum of one host. Continuing from the scenario above if person A (host) allocates person B (cohost) to the host role, the result is: Person B is now host and Person A now reverts to being a participant (Person B would have to reinstate Person A as a host). Note that if the host privilege is transferred, the breakout groups membership will be reset.
- There is a minimum of one host: Continuing the scenario further, if Person B leaves the meeting and then Person A’s (host) internet connection drops. The result is that one of the participants will be randomly allocated as a host (the participant would have to reinstate the host later).
- Claim host key: When scheduling a meeting it is possible to enable participants to join before the host. We do NOT recommend this enabled. However, if it is enabled, then potentially students can join the meeting before the member of staff and start conversations. They will see an option to ‘Claim host’ and be prompted to enter a key. They will only be able to do this if given the 6-digit key from the meeting organiser – again we do not advise enabling this functionality with students. More information about host keys can be found here.
Making a participant a Co-host
There are two ways that you can make a user a co-hos:.
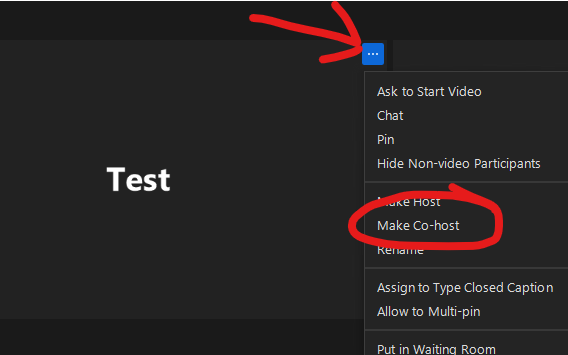
During a meeting:
- Hover over a user’s video.
- Click the more icon (…).
- Click Make Co-Host.
Using the participants window (found at the bottom of the screen):
- Click on Manage Participants in the meeting controls at the bottom of the Zoom window.
- Hover over the name of the participant who is going to be a co-host, and choose More.
- Click Make Co-Host.
Once a participant has been made a co-host, they’ll have access to the co-host controls.
More information about co-hosts is available on Zoom’s help pages.
Live captions
Note: Currently some Zoom hosts are experiencing issues when using the live transcription feature, whereby the host is removed from the meeting. For most users updating their Zoom client will solve the issue. For others you may consider not using the transcription functionality until it is fixed.
As a host, you can enable live transcripts on Zoom.
In the meeting click on More > Captions.
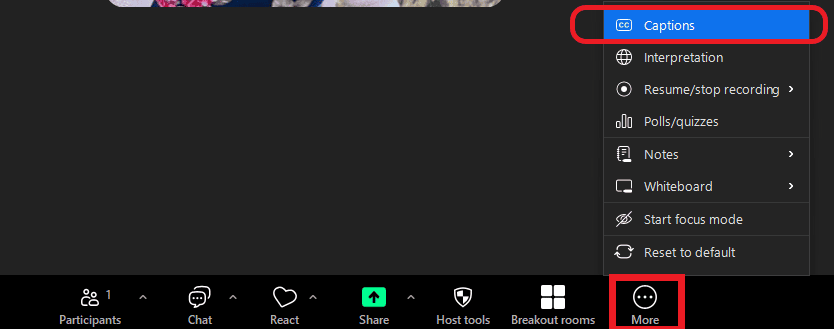
It will enable a CC button in the main menu at the bottom of the screen where you can select and set up options for the live captions, like the language.
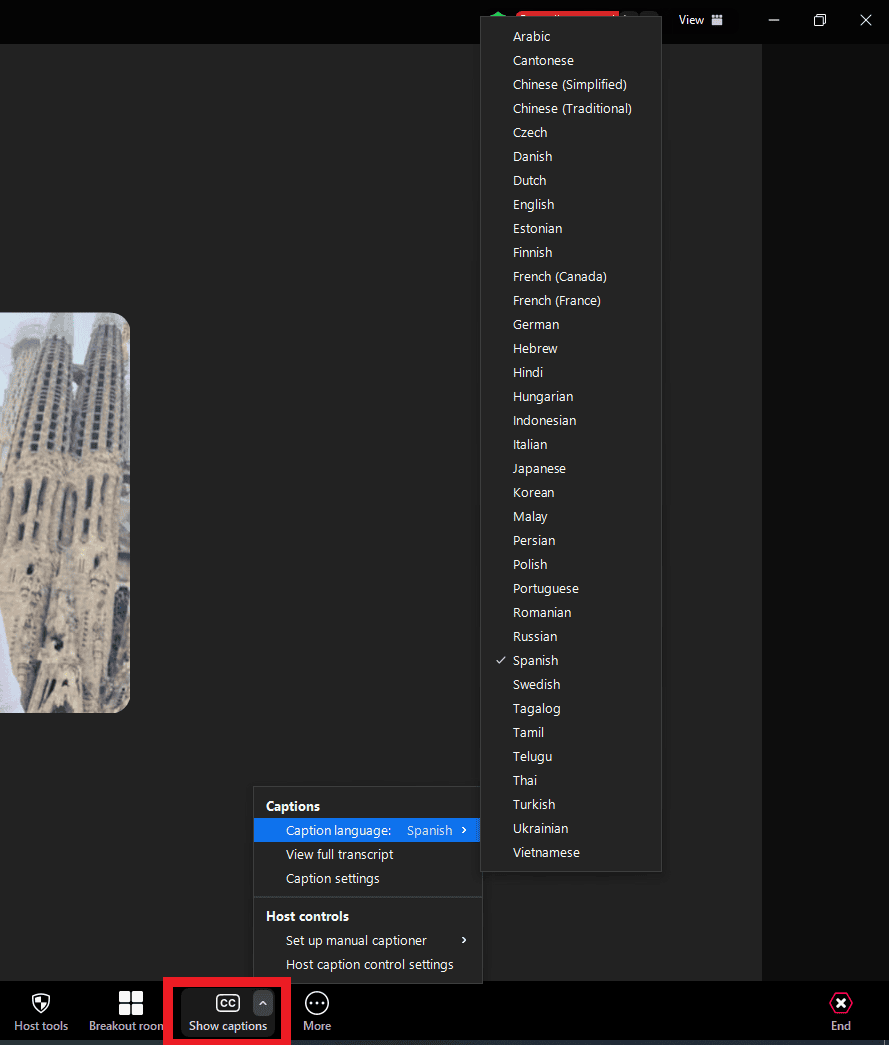
Then choose Enable Auto-Transcription.
Students will be able to now see a Live Transcript of what is being said. Students can hide the subtitles if they do not need to view it.
Managing Participants
There are several ways to manage participants during a Zoom meeting such as: Mute participants, prevent participants from screen-sharing, and remove a participant. This help page explains ways in which to manage participants during a Zoom meeting. This video further explains how to use meeting controls during a Zoom meeting.
Presenting and collaborating in a meeting
Recording a Zoom meeting
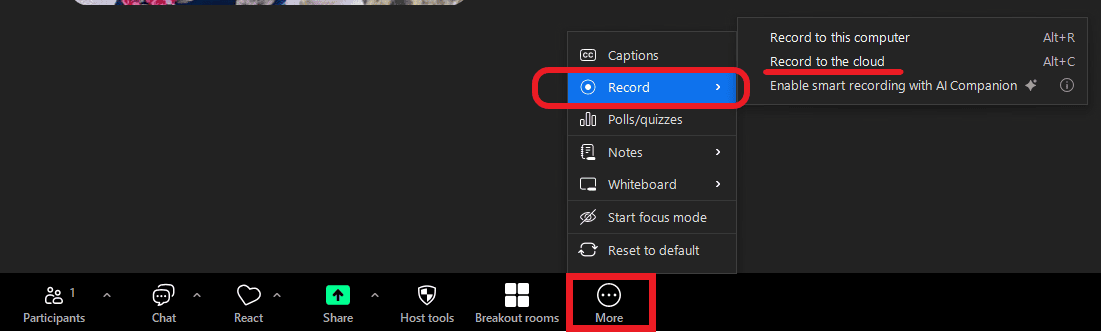
To record a meeting, the Host should press the “record” button at the appropriate time. The Host may wish to request the permission of participants before recording, but this is not a requirement as our Student Registration Document covers recording students for teaching purposes. During the meeting, you can pause or stop the recording. If you pause the meeting, a separate video is created once you start recording again (e.g. if you press pause once, you will end up with two videos).
If you record a meeting in Zoom, it will automatically be moved to the meeting organiser’s My Folder in Panopto (in a sub-folder called Meeting Recordings, meeting organisers will receive an email notification). A copy will also be saved to Zoom Cloud Recordings for 30 days after which it will be moved to the recycle bin (there is no need to do anything with the Zoom Cloud recording).
From the Panopto > My Folder > Meeting Recordings Folder, the meeting organiser should move the recording to the corresponding Moodle/Panopto folder, which will share it with the cohort.
We recommend adding a link and/or an embedded video into your Moodle page so that it is clearly signposted to students.
Please note, the recording will be stored with the account of the person scheduling the meeting’s Zoom and Panopto account, so only they will be able to access the recording (even if they did not attend the meeting and an alternative host ran the meeting instead). It may take some time for the meeting recording to appear on Panopto (up to 24 hours). The person who scheduled the meeting will receive an email when it is ready.
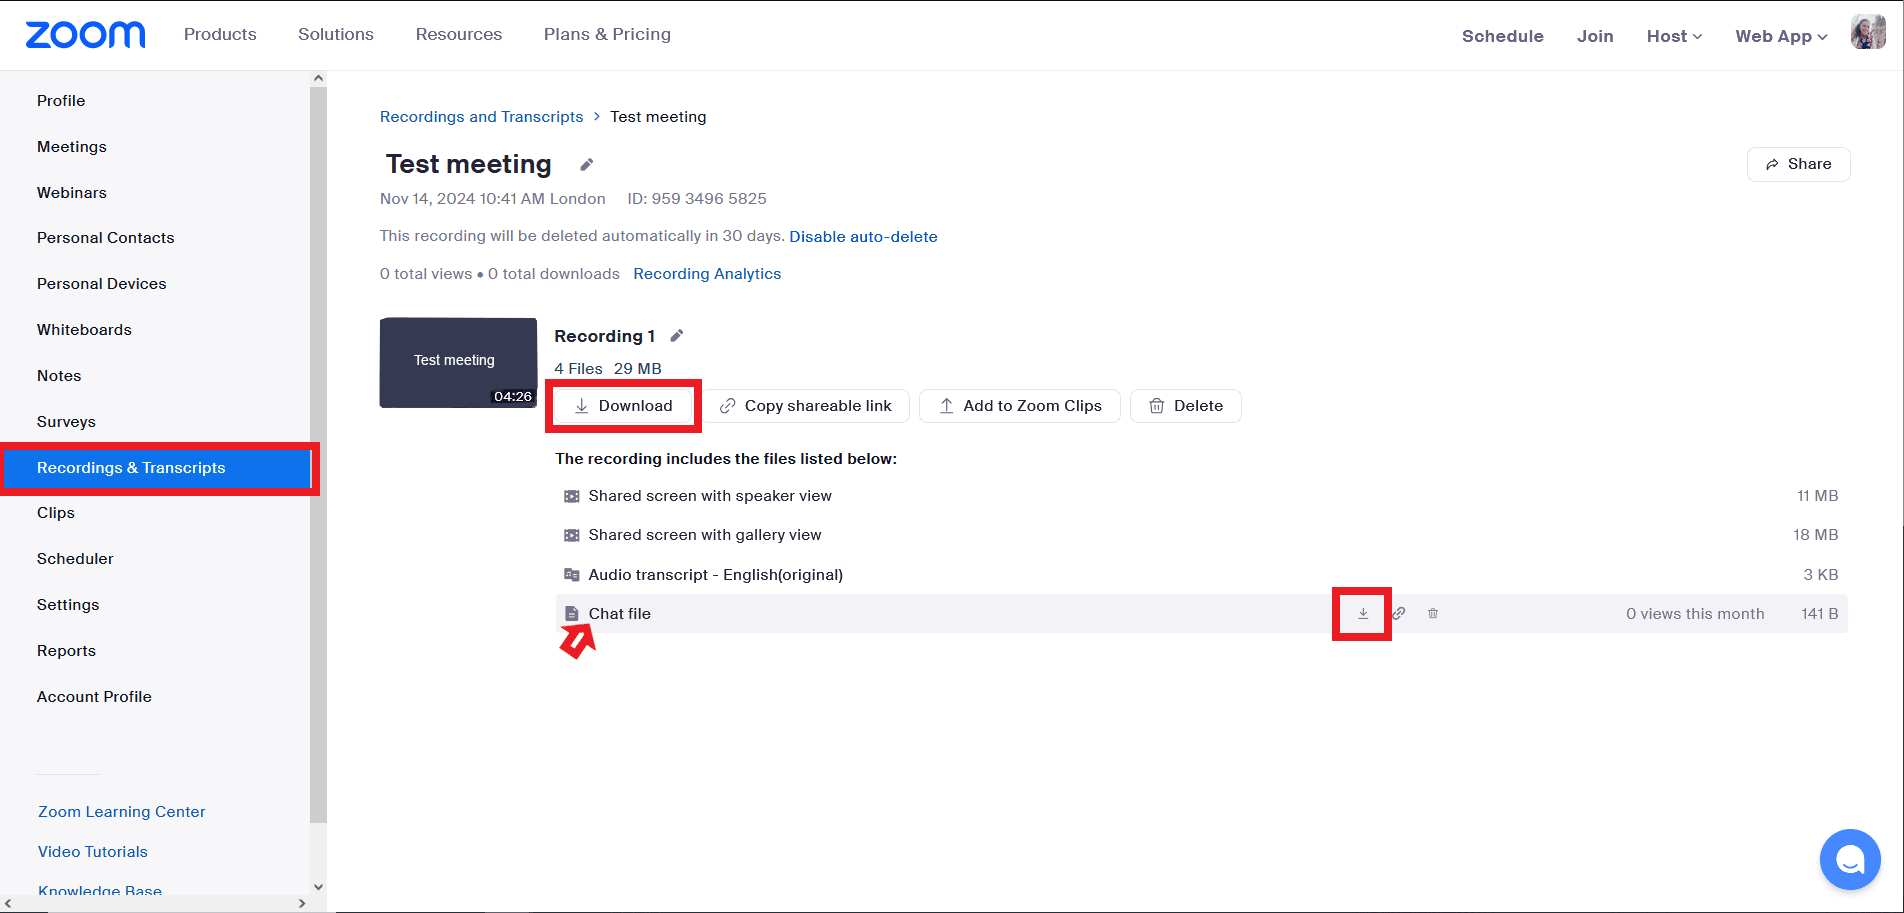
The simplest way to download the meeting chat is to go the Recordings folder in Zoom Cloud select the recording and find a copy of the “Chat file” next to the meeting recording.
- Log into Zoom in the browser.
- Click on recordings on the left hand side of your screen.
- You will see a list of available recordings. Click on Files.
- Download the relevant chat file.
Downloading the chat directly from the meeting is disabled by default. If you enable it for yourself, you will do so for everyone (including students). To change this go to My Settings in Zoom and untick “Prevent participants from saving chat”.
Further detailed instructions can be found on the Zoom help pages.
Register of attendees
There are two ways to access the usage reports: A) via Moodle or B) on the web (bath-ac-uk.zoom.us). These reports contain the time a participant joined and the duration they logged in for.
A) Viewing attendee lists in Moodle
This method is easy to find as you just go to the meeting invitation on Moodle. It also allows any teacher on the course to view the reports.
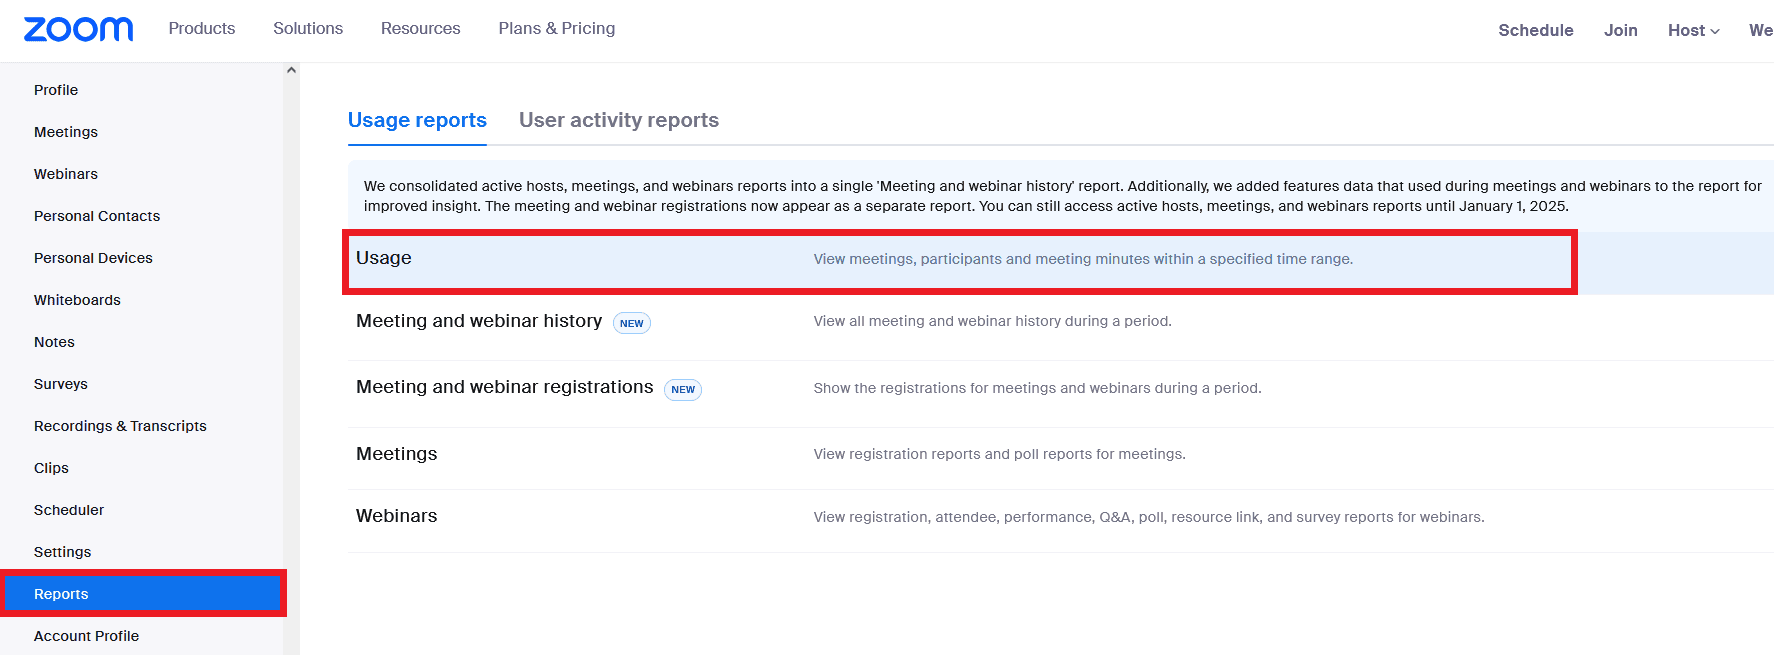
- Go to the menu at the left side of the screen and click on Reports > Usage Reports > Usage (see image below)
- Then search for the Meeting you are interested in and click on .
- The meeting report details the participants name, email, join time, leave time and duration they attended for.
- You can “Export as a CSV file” to download the file.
Please note, there may be duplicate entries for participants if they have rejoined the meeting.
B) Viewing attendee Usage Report on Zoom Web
These usage reports list all meetings the host has scheduled (including one’s not scheduled via Moodle) and also have a useful feature to only “Show unique users” (this merges participant entries, e.g. a student leaving and rejoining meeting, into a single entry per student a single participation duration time).
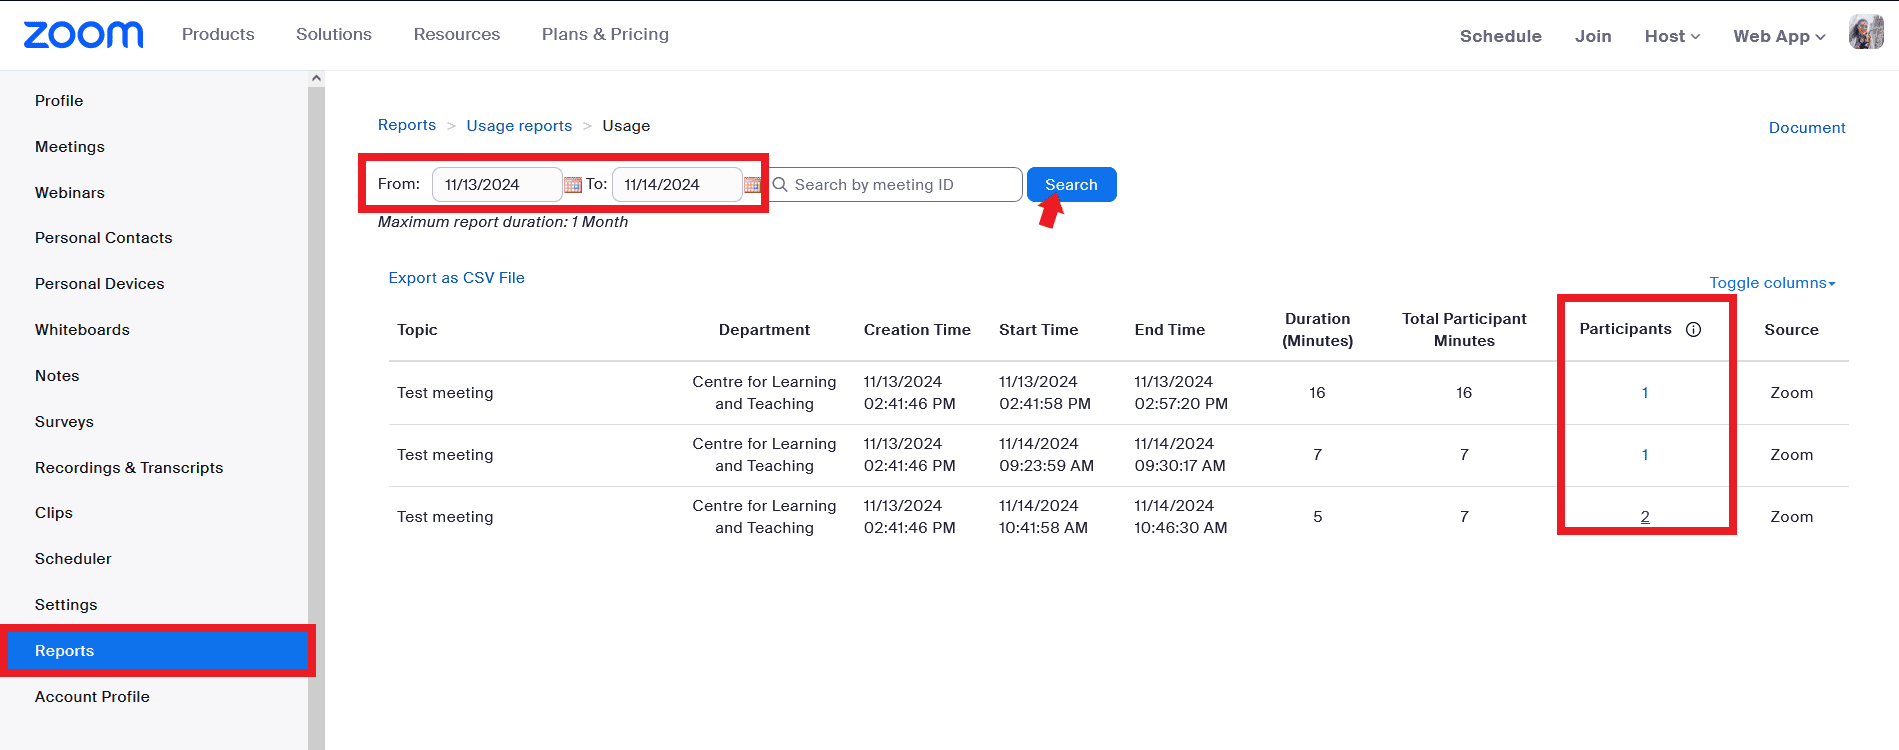
- Go to bath-ac-uk.zoom.us and Reports (via menu on the left).
- Select “Usage” reports.
- Enter the time period you are interested in and click search.
- A table of all meetings within that time period is then displayed.
- From the list, choose the session you want the report from by clicking the corresponding number of participants (pictured below).
image. - Use the Export button to save the file as a csv. You can also select “Show unique users” to give a combined overview of the duration a user was in a meeting.
Testing microphones and webcams
Zoom have detailed instructions on how to test your setup here. You can test these settings in a meeting or better still visit zoom.us/test to test your setup before a meeting.
The TEL team are unable to troubleshoot individual problems, particularly if this is a hardware/software issue particular to your setup. Some common fixes to issues are:
- Try unplugging/replugging in devices.
- Try rebooting your device.
- Check the microphone settings and security permissions for your device: