Published on: 30/08/2023 · Last updated on: 29/07/2025
Preparing to grade an Assignment
Before beginning marking it’s important to understand how your assignment has been setup, so that you can ensure that you are not showing marks and feedback to students before you are ready for them to see them.
When you create an Assignment, the ‘Marking Workflow’ setting will be enabled by default. This automatically hides any marks and feedback that you upload for students until you take specific steps to release the marks and feedback.
Guidance on releasing Marks and Feedback, and sending a notification to students with a few clicks, using marking workflow can be found below.
Lock submissions to prevent changes
Before you begin marking it’s important to lock submissions. This will stop students from making any changes to their submissions once marking is underway.
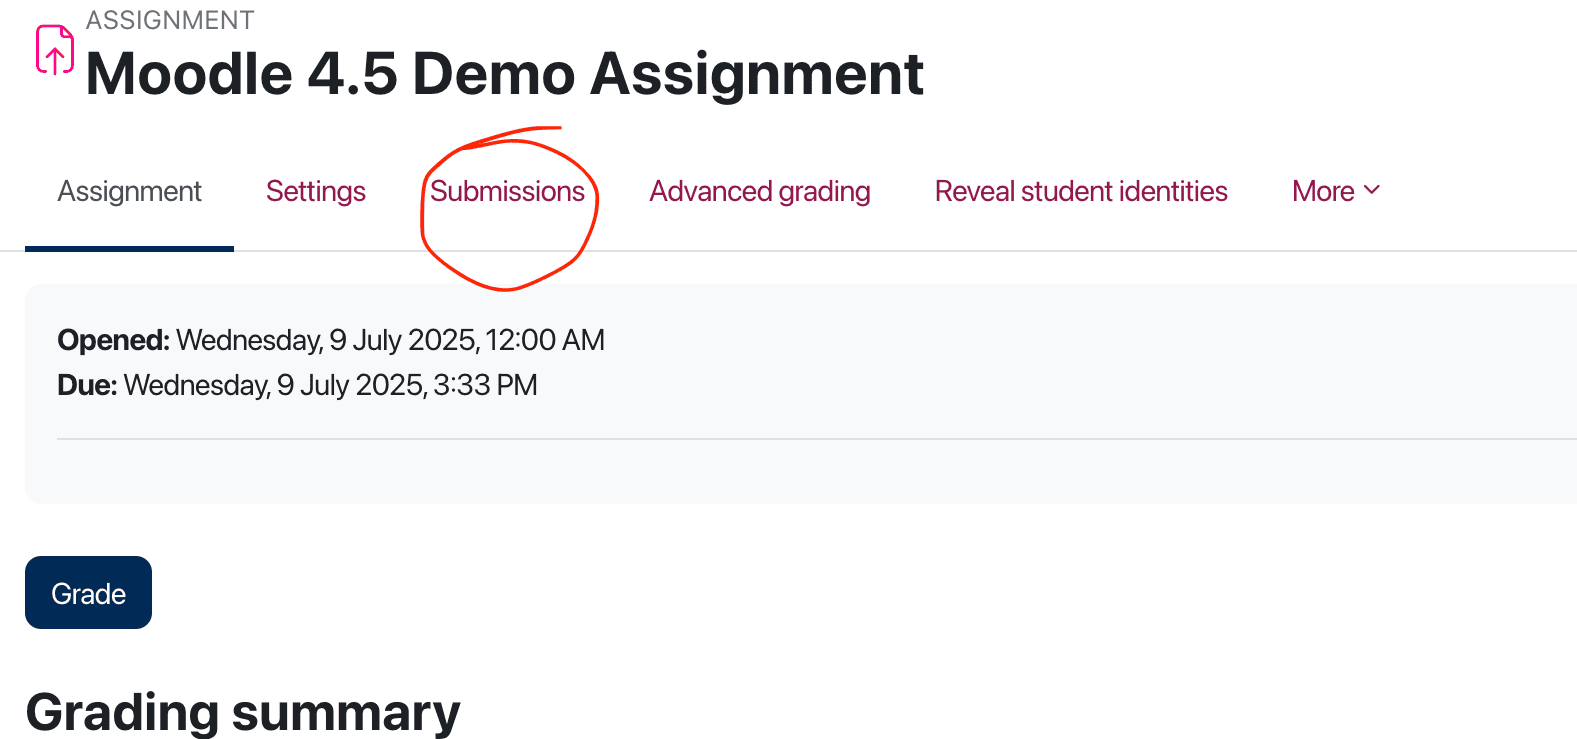
- Click on your Assignment choose Submissions from the top menu
- Tick the box at the top of the ‘select’ column to select all user submissions.
- From the options that appear on the pop up menu on the bottom of the screen choose Lock to lock the submissions.
- Confirm the pop-up prompt that appears.

Download submissions/Mark offline/Upload Annotated submissions
You can download student submissions in order to annotate them offline. Moodle allows all submissions to be downloaded in a single zip file and to be returned after annotation, with any additional files if desired, in the same manner. You can also download the Grading Worksheet, add marks to it, and re-upload to Moodle to award marks to all students. Please see the video below for full details, or follow the steps underneath it:
To download student scripts and the Grading Worksheet:
- Navigate to your assignment and select it.
- Click the Submissions link at the top.
- Note the option, (found at the top of the page above the Grading Table) for Download submissions in folders:
- if the submission is more than a single file, or if you have a feedback form to return to students, tick the box.
- if the submission is only one file, which you will annotate and return to students, leave unticked.
- From the Actions menu at the top choose Download all submissions.
- A Zip folder will be downloaded to your machine. Right click the folder and choose ‘Extract all’ (or similar), then click ‘Extract’. Files will be extracted.
- You can now open the files to read and annotate them. Important! When saving annotations DO NOT rename the files.
- Return to Moodle, and from Actions menu, choose Download Grading worksheet (Bath version).
- Save the file, noting that it is a .CSV file, not a standard Excel document.
- Open the file from your Downloads folder (if using a Mac you may need to right click on it and specify ‘open with Excel’) and add grades to the Grade column as desired. Important! DO NOT change any column headings.
- You may optionally add short comments for students in the Feedback comments column.
- Save changes ensuring the file type is .CSV
To return summary comments and the completed Grading Worksheet to Moodle:
- Navigate to your Assignment and select it.
- Click the Submissions link.
- From the Actions menu at the top choose Upload Grading worksheet.
- Select the .CSV file you saved (drag and drop, or ‘choose a file’) and click Upload grading worksheet and confirm. Grades and any summary feedback comments that you included will now be shown in the Grading table.
To return annotated scripts to Moodle:
Before returning the annotated scripts as feedback files, you must add them to a .zip folder.
If you downloaded all of the submissions in a single .zip file:
- Navigate to the folder that you have stored the annotated files in, and open it so that you can see all the file thumbnails.
- Select all of the files (CTRL+A on Windows or Command+A on Mac).
- Right-click and choose Send to…then Compressed (Zip) folder (on Windows) or right-click and choose Compress (on Mac).
- The new .Zip folder will be automatically named after one of the files, this isn’t a problem, but rename it if you wish (right-click and Rename).
- Return to the Moodle Assignment, and from the Actions dropdown menu (where you downloaded the files from) choose Upload feedback files in a Zip
- On the next page, Choose a file or drag and drop the .zip file into the file upload area on-screen.
- Click Import feedback file(s), then Confirm and Continue.
- The annotated feedback files will now be displayed in the Feedback files column in the Grading Table.
If you downloaded the student submissions in folders:
- Navigate to the folder containing the folders of annotated files (and any additional feedback files you are returning to students) and open it.
- Select all of the folders (CTRL+A on Windows or Command+A on Mac).
- Right-click and choose Send to…then Compressed (Zip) folder (on Windows) or right-click and choose Compress (on Mac).
- The new. Zip folder will be automatically named after one of the folders, this isn’t a problem, but rename it if you wish (right-click and Rename).
- Return to the Moodle Assignment, and from the Actions dropdown menu (where you downloaded the files from) choose Upload feedback files in a Zip.
- On the next page, Choose a file (or drag and drop) to get your .zip file into the file upload area on-screen.
- Click Import feedback file(s), then Confirm and Continue.
- The annotated feedback files will now be displayed in the Feedback files column in the Grading Table.
Marking a Group Assignment
Where one student has uploaded a file on behalf of their Group, the file will appear against all Group members, and any of these can be marked. On the individual student grading page, an option to ‘apply grade and feedback to all members of group’ will appear. If ticked the grades and feedback will be applied to all group members.

Allocate Assignments to another Marker
You can use the Marking Allocation feature to assign student submissions to another marker in your course.
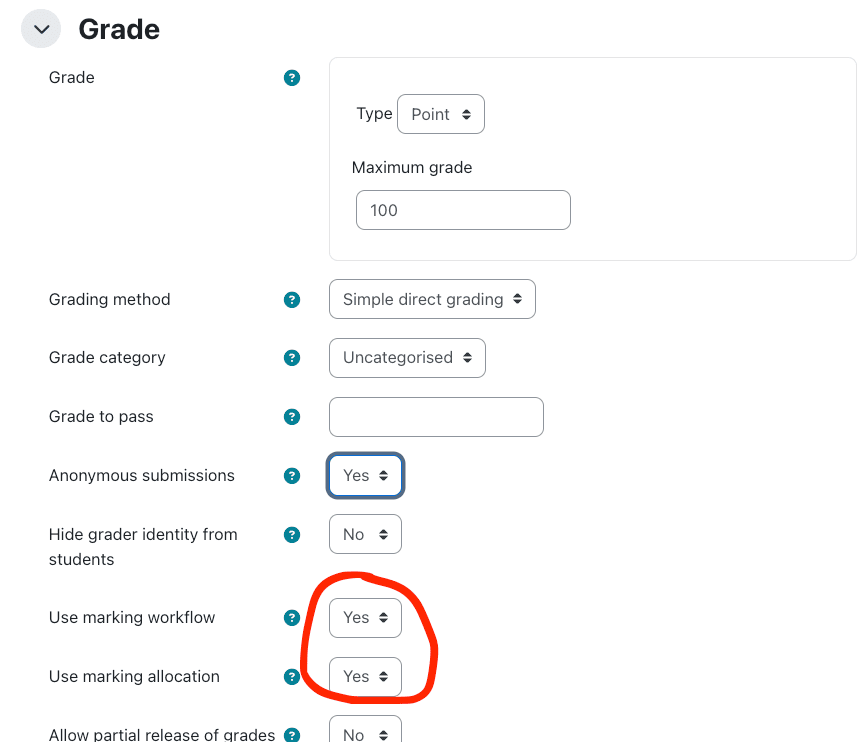
Marking Workflow and Marking Allocation must be enabled in your assignment settings:
Once these have been enabled, to allocate assignments to a marker.
- Click on your Assignment link.
- Click on Submissions at the top.
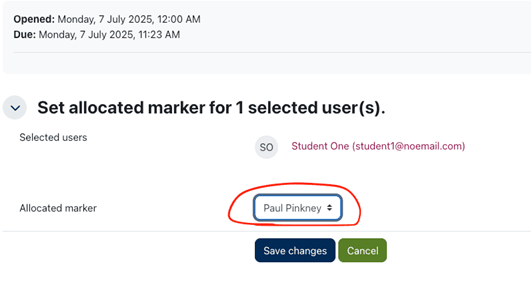
- Tick the box to the left of the student whose assignment you want to allocate, then from the bulk action menu at the bottom of the window, choose More and then Allocate marker
- At the prompt click Allocate marker, then on the next page select your allocate marker from the dropdown and click Save Changes.
How to lift anonymity in an Assignment
If anonymous marking is enabled, to release all grades and feedback, you will need to lift anonymity.
- In assignments with anonymous marking enabled, instructors can grade submissions and then release those marks without revealing student names.
- This means students can receive their grades and feedback promptly, while staff continue marking without bias or identifying information, for example if some students have extensions.

To lift anonymity:
- Click on the Assignment link
- From the top menu choose Reveal student identities
- Note the prompt information and Continue
