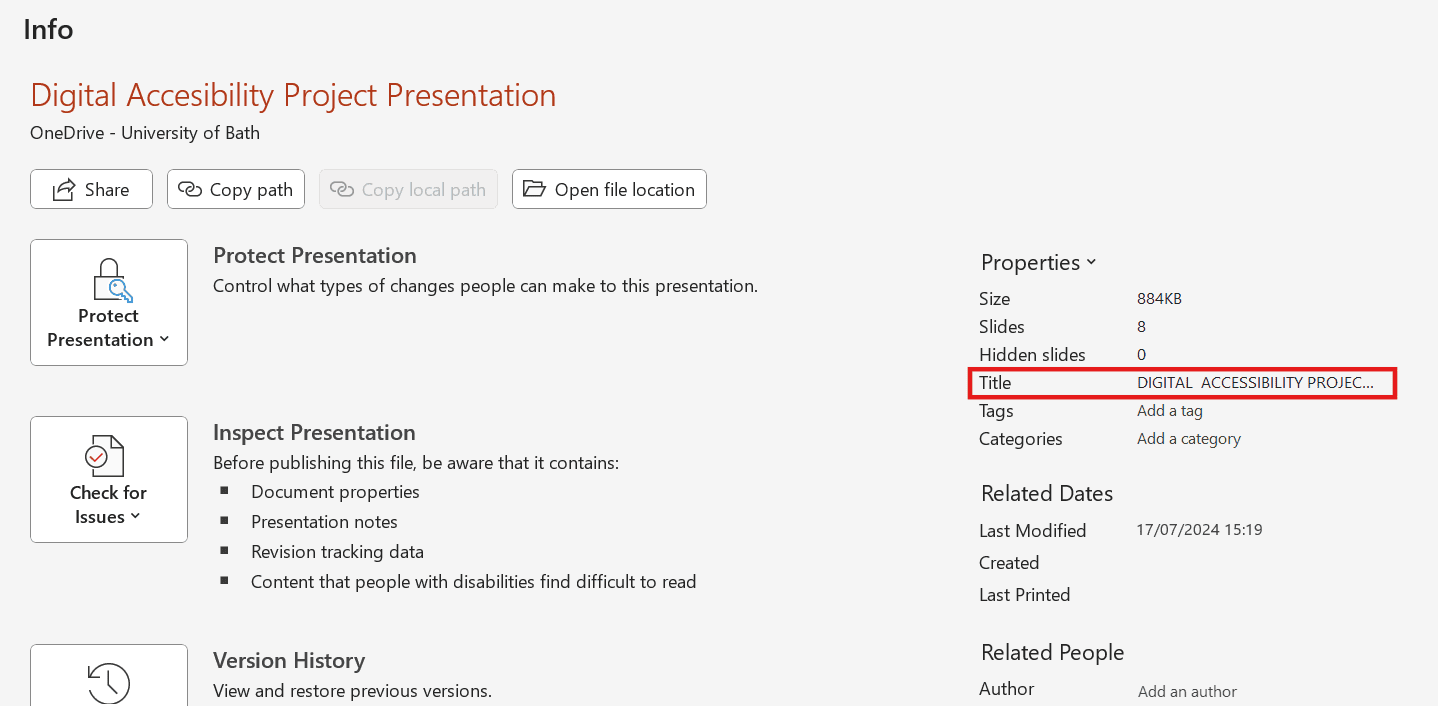
Save the presentation with a descriptive file name
When accessing a document, the first thing encountered is the file name. A unique, descriptive file name helps individuals understand the general topic of a document.
To change this on PowerPoint click ‘File > Info > edit ‘Title’ under the ‘Properties’ menu.
Use an accessible template
Using and accessible templates, or copying your content into one can help prevent accessibility issues.
Microsoft has several accessible templates that you can use by following the instructions in the Microsoft Learning Pathway Using Templates.
Note: Accessible templates are only a starting point of accessibility. Additionally, templates that claim to be accessible may have some accessibility issues. Its important to make use of your knowledge on accessibility and best practices when working with templates.
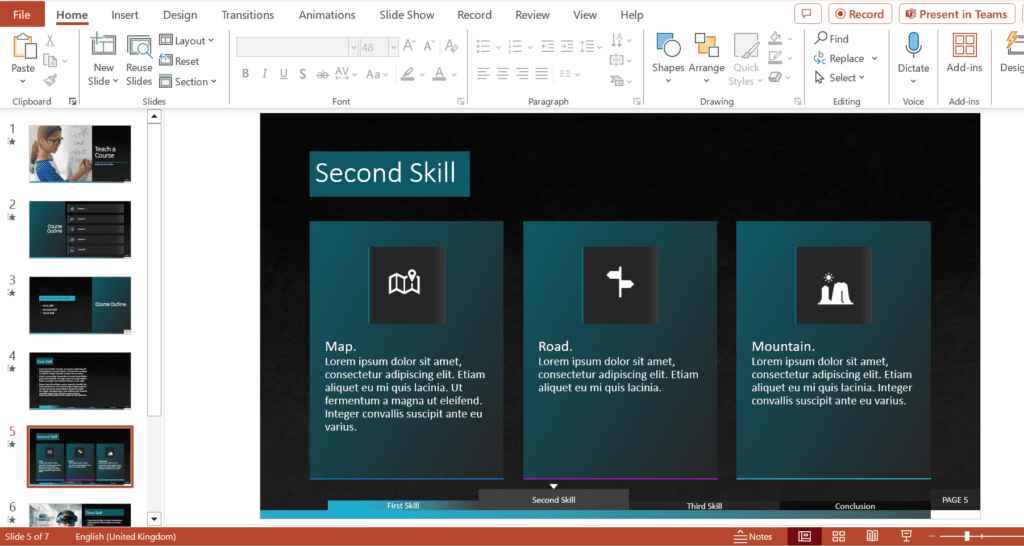
Microsoft Accessible Template: Classic Corporate Teach a Course Template
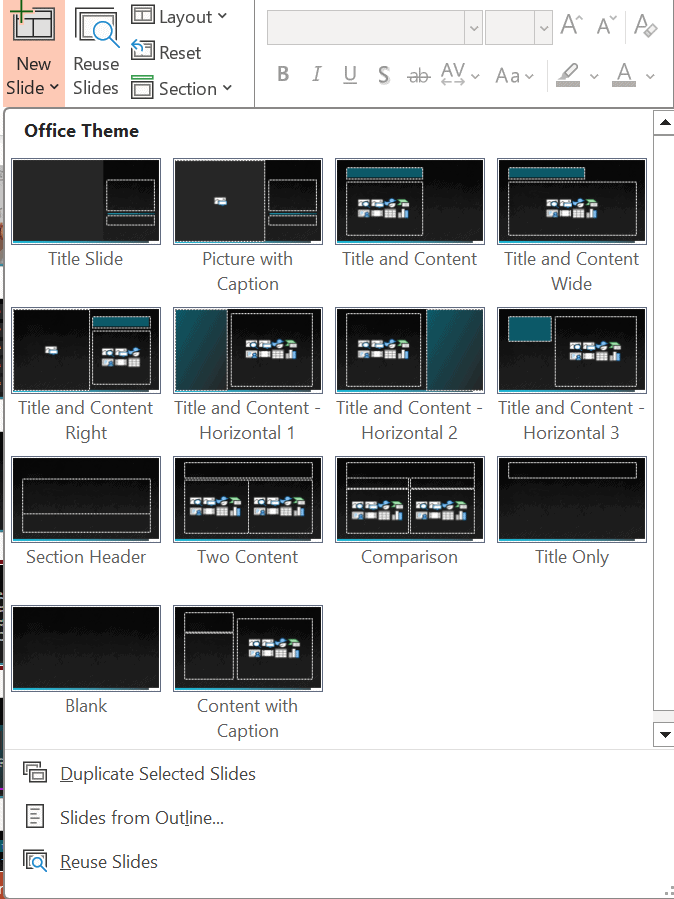
Use a layout for each slide
Slide layouts will improve the structure of the content within your slides.
Be aware if you add a blank slide, with no layout, it may cause inaccessibility and require more fixes. For more information about slide layouts, see Microsoft’s guidance on What is a slide layout? and find out how to Apply a slide layout.
Below is a screenshot of the layouts available from the Microsoft Accessible Template: Classic Corporate Teach a Course.
Published on: 22/07/2024 · Last updated on: 11/06/2025
Give each slide a unique title
Having a unique, descriptive title on each slide is important. Screen readers use titles to navigate through content. Titles provide context about the purpose of the slide. This allows students to understand the information that is being presented. Even when several slides have similar content unique title. In those cases, adding “(cont)” or “(continued)” is enough to make the title unique.
For extra guidance on how to Title a slide Microsoft Support provides some instructions.
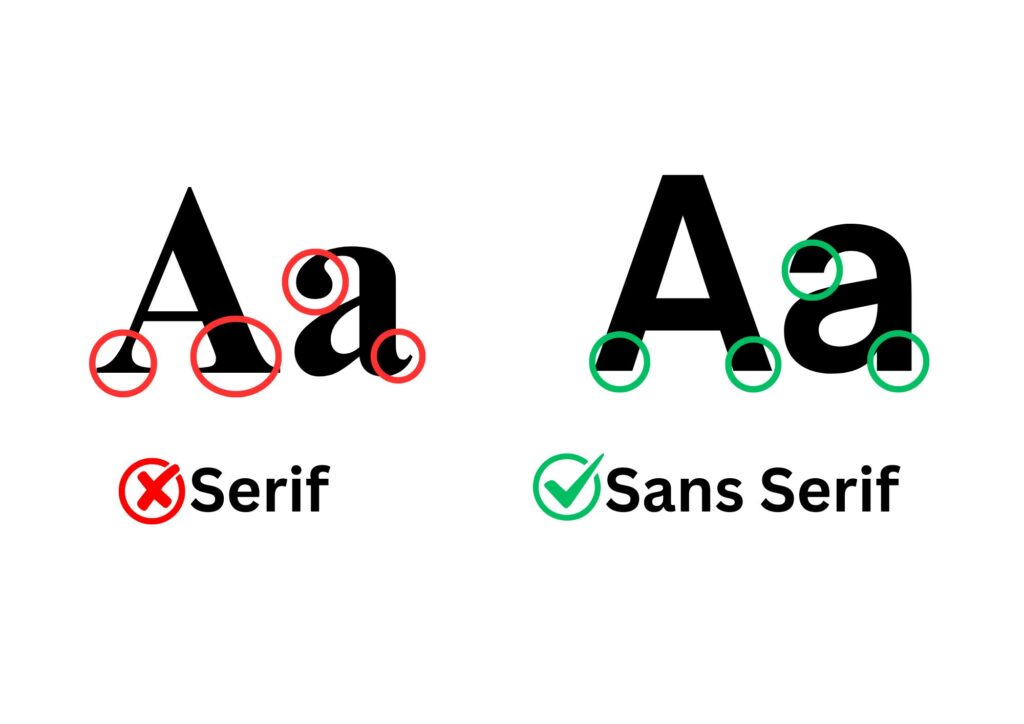
Use a clear font
Sans Serif fonts such as Arial and Calibri are more accessible than serif fonts such as Times New Roman. Serif fonts have ‘feet’ on the end of each letter which can make them less accessible to readers.
Use a large font size
Presentation Slideshows are usually shown to a group of people. To ensure that all people who are witnessing the presentation can read the slides, it is advised that the font is no smaller than 18pt (ideally 20pt). Text smaller than this is too small to support viewing in a room and print accessibility.
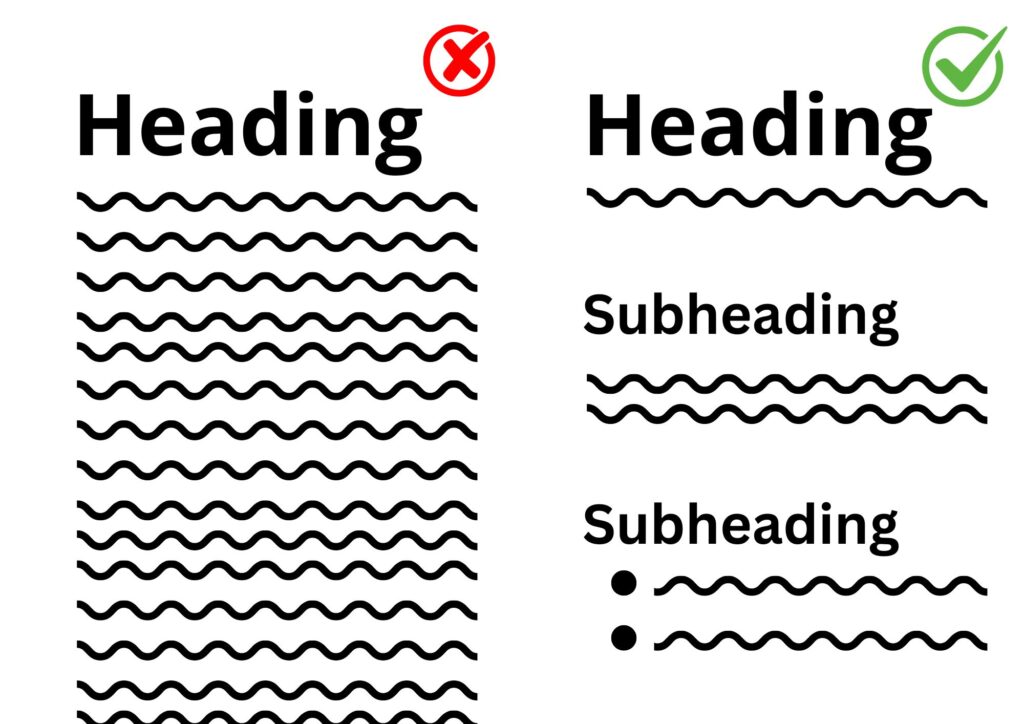
Balance content with white space
Gaps between information increases readability and reduces cognitive overload for viewers.
To avoid slides being too overwhelming, use minimal amounts of text on the slides. If you are using lots of text on a slide, consider providing the text to students in a separate file. The key idea is to keep slides uncluttered and to optimise slide layouts using formats such as subheadings and bullet points.
Avoid using colour as the only way of conveying information
Showing information with colour only may make the information less accessible. In the UK there are approximately 3 million colour blind people (about 4.5% of the entire population). Information shown with colour only will not be accessible for people with colour blindness.
Don’t rely only on color to convey information. Think about a stop sign; yes, it’s red, and for most people, that grabs attention immediately. But it’s also a unique shape and it says the word “STOP” in big letters. The combination of those three factors make stop signs color blind-friendly.
Another example, writing out links in blue font isn’t enough. Underlining hyperlinks ensures everyone will understand where to click.
Check the colour contrast
Slides that have a strong contrast between text and background are more accessible for learners with low vision or colour blindness.
The colour contrast between the text and background is key. The WebAIM: Contrast Checker is a useful tool that allows you to check the contrast by using hex codes. The contrast is calculated based on the ratio of 8.59:1. There is a bookmark version of this tool that allows you to check the contrast across desktop apps and sites. For additional information about colour contrast access the Accessible Colour and Contrast article on the Learning and Teaching Hub.
Note: The Microsoft Accessibility Checker may not pick up on all colour contrast issues particularly for textboxes within slides. It is important to conduct your own manual checks to ensure accessibility.
Verify the Reading Order
Students may use a screen reader which reads aloud the academic content on their device. Placing the contents of each slide in a logical reading order is crucial for screen reader users to understand each slide.
For the step-by-step instructions how to set the reading order, go to Make slides easier to read by using the Reading Order pane.
Find out more: Nearly 2 million people in the UK live with sight loss, and screen readers help them to access digital content.
Write alternative text
Alternative text or Alt text explains what an image represents to non-sighted individuals.
Alt text should be written for: images, image groups. Microsoft SmartArt graphics, shapes, charts, and embedded videos
In alt text, briefly describe the image, its intent, and what is important about the image. The alt text shouldn’t be longer than a short sentence or two—most of the time a few thoughtfully selected words will be enough. For extra guidance on Everything you need to know to write effective alt text is available from Microsoft support.
Provided alternative formats for audio visual content
Audiovisual content can be accompanied by subtitles and captions. Captions are essential for any audiovisual content. Subtitles contain the dialogue as text and captions describe audio cues such as music or sound effects.
For videos, a video description may be appropriate. A video description is a narration of the key visual elements in a video. These descriptions are inserted into natural pauses in the dialogue.
WebAIM: Captions, Transcripts, and Audio Descriptions -> Insert audio description
For audio only media, a transcript can be an accessible alternative format to include.
For further guidance on this Add closed captions or subtitles to media in PowerPoint – Microsoft Support
Format tables
Tables can be difficult to navigate for students who use assistive technologies. If tables cells are incorrectly formatted, it is difficult for screen readers to process the information. Screen readers use headers to navigate information, so it is important that any table you create has headers. If tables have fixed width, they are less accessible for assistive technology. Assistive technology that enlarges the screen will not be able to zoom into the table if it has a fixed width. Merged cells in tables are a challenge for screen reader users as they need to ‘imagine’ and understand the layout of the table which is no longer as simple as columns and rows
When possible use alternative layouts to present data such as a paragraph with headings. When creating tables in PowerPoint, use table headers. To learn about how to do this access the Microsoft Training PowerPoint: Use table headers – Microsoft Support
Complete a final accessibility check
Think of an accessibility checker as the equivalent of a spell checker. Few people would save a document without spell-checking, so why not get into that mindset for accessibility too?
On PowerPoint, there is a built-in Accessibility Checker that highlights any accessibility issues in your slide show that need changing. Please note that the accessibility checker is an automatic tool and does not pick on all the accessibility issues. Your digital accessibility awareness and best practices will need to be used to ensure the work is accessible.
Saving PowerPoint as a PDF
In some cases you may not be able to make your PowerPoint Accessible.
In those instances it may be appropriate to save the PowerPoint as an Accessible using the ‘Save As’ tool.
For more guidance see the University of Bath’s Checklist for an Accessible PDF from the Learning and Teaching Hub and access the Create accessible PDFs article by Microsoft Support.
Make the slideshow available to students in advance
Providing students with your slideshow at least 24 hours before the presentation is best practice.
Sharing slides early allows students to prepare for and engage with your presentation. Assistive technology users will have time to process the information in a way that suits them. Students with language difficulties or who are multi-lingual can use the extra time to process the slides and learn key vocabulary. Providing the slideshow in advance allows students to print the slides as well.
It is helpful to sign-post that access to the slides is available before the start of your presentation. Students will be able to navigate through the slides at a pace that suits them, allowing them to engage with the presentation.