Published on: 21/07/2023 · Last updated on: 23/10/2025
Introduction
There are several ways to add recordings to a Moodle-linked folder for students to view them. For retention purposes, it is not recommended to store course-related recordings in My Folder, personal storage spaces, or on other platforms outside of Panopto.
Move existing recordings in Panopto from a previous year’s Moodle-linked folder to a current Moodle-linked folder.
If you have recordings that are designed to be used year-on-year then you should move them to the appropriate Moodle-linked folder for the current cohort. An example of this would be a short video used to introduce a topic featuring only your own voice, image and some slides. If the recordings should continue to be accessed by the previous cohort(s) as well as the current cohort, you should move them to the appropriate Moodle-linked folder and share them with the previous cohort(s). If you have any queries about re-using recordings, please see the University’s Teaching Capture policy and email the University’s Copyright Advisor.
The following video explains the Moodle-linked folder structure and how to move recordings for re-use.
Video: Panopto Moodle-linked folder structure and re-using recordings
Instructions to move existing recordings to a current Moodle-linked folder.
First, ensure that you have Creator permissions on both the folder you are moving recordings from and the folder you are moving recordings to. Contact the Unit Convenor if you require access.
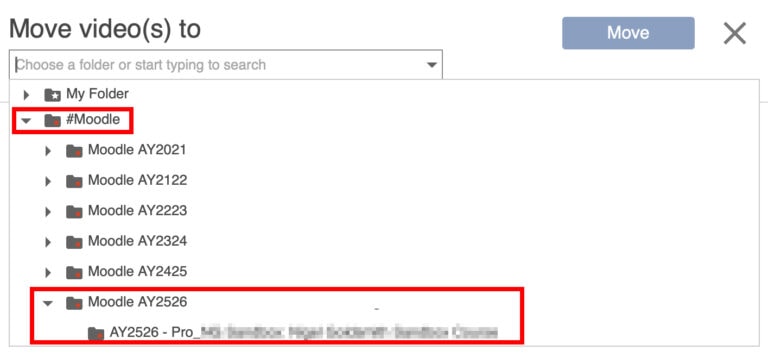
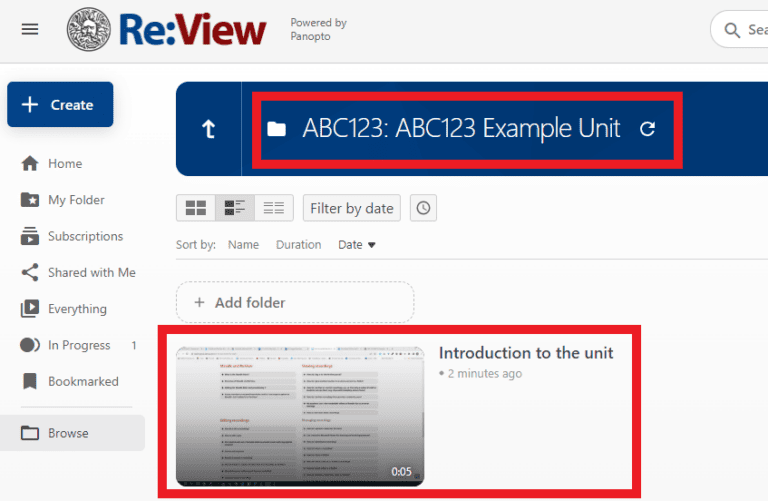
Navigate to the Moodle-linked folder from the previous academic year.
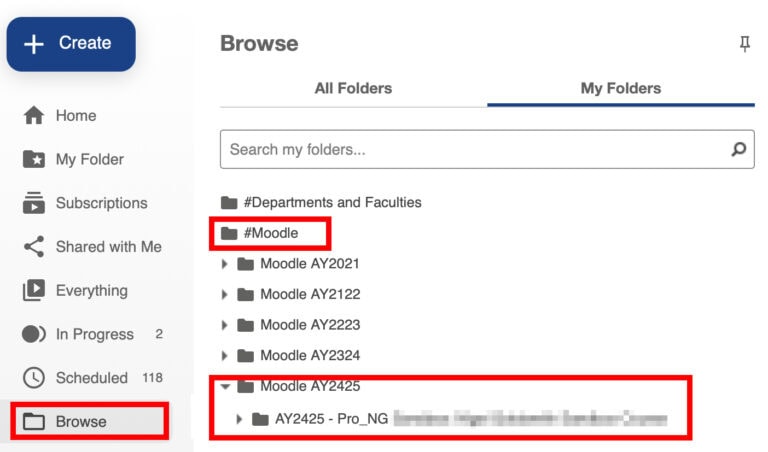
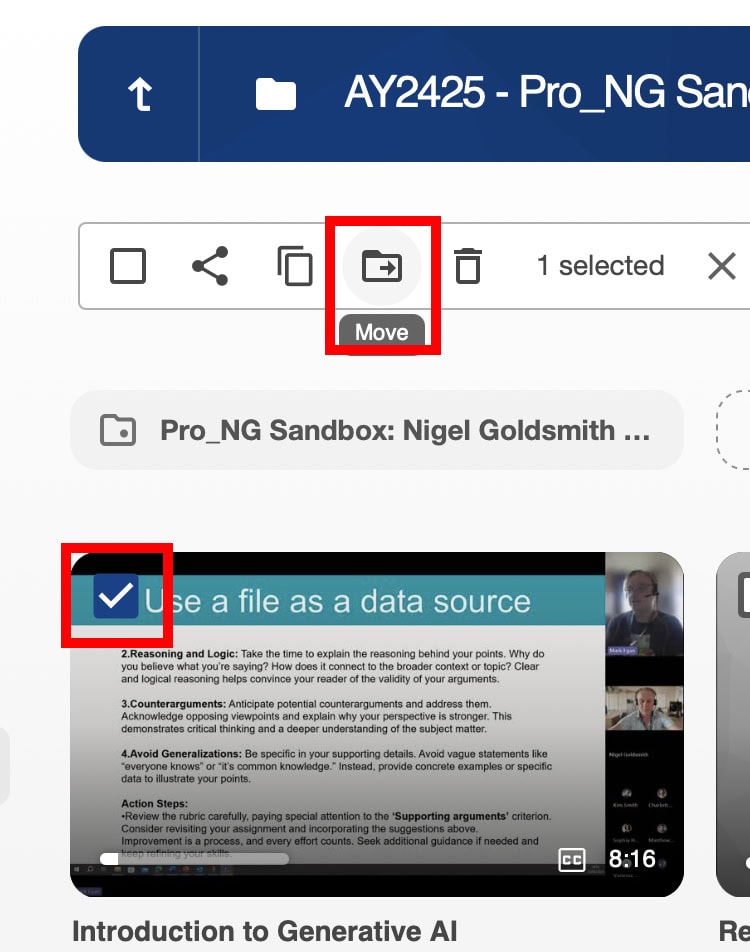
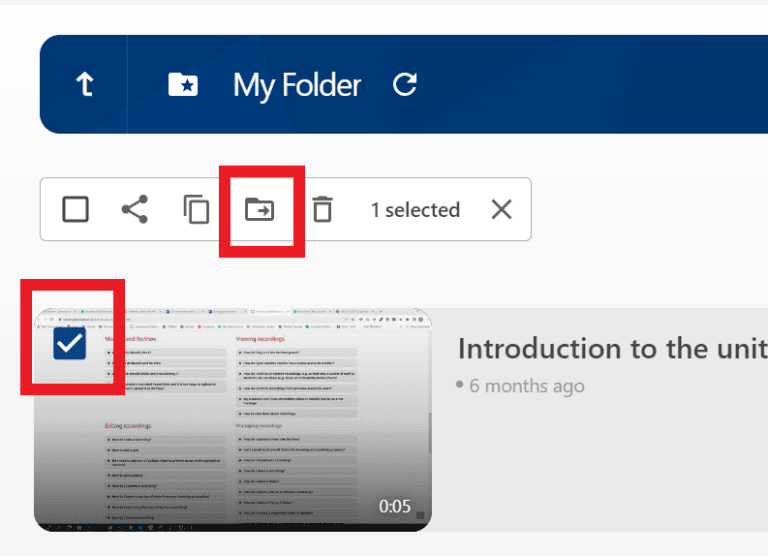
Hover over the recording(s). Click to tick the checkbox in the top-left corner of the preview image and click Move.
Locate the Moodle-linked folder for the current academic year.

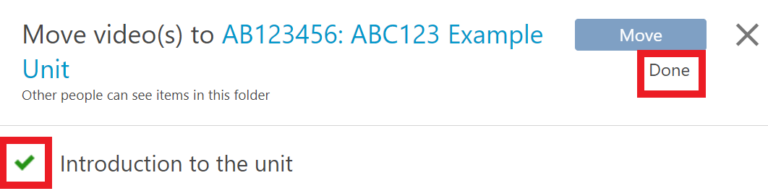
Click Move.
Done will appear when the recording has been successfully moved.
If previous cohorts continue to need access to the recordings, you can share the recordings with them.
Pre-record content on Panopto desktop recorder and save a recording to a Moodle-linked folder.
There are two options when recording using Panopto desktop recorder. One option is to upload to My Folder and move the recording to the appropriate Moodle-linked folder. The other option is to upload directly to a Moodle-linked folder.
Option 1 – Upload from Panopto desktop recorder to My Folder and move the recording to a Moodle-linked folder.
This option is appropriate when you do not wish to make the recording available to students immediately. The recording may need editing or is for release at a later date.
Open the Panopto desktop recorder. Guidance about how to download and use the Panopto desktop recorder can be found on Panopto’s website.
The screenshots of the Panopto desktop recorder (below) are from the Windows version of the application. The Apple Macintosh version of the recorder looks quite different thought it shares most of the main features.
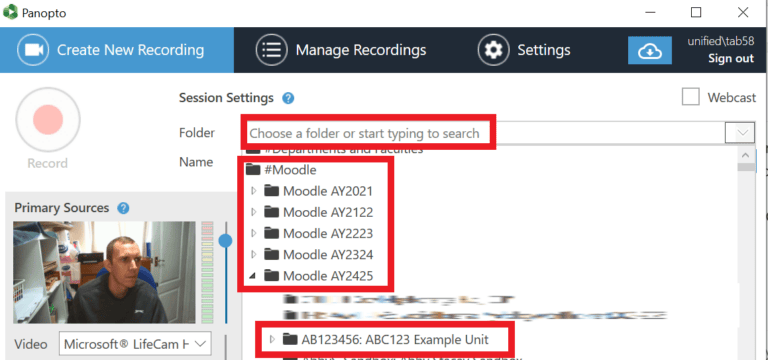
Search or navigate to My Folder from the drop-down menu.

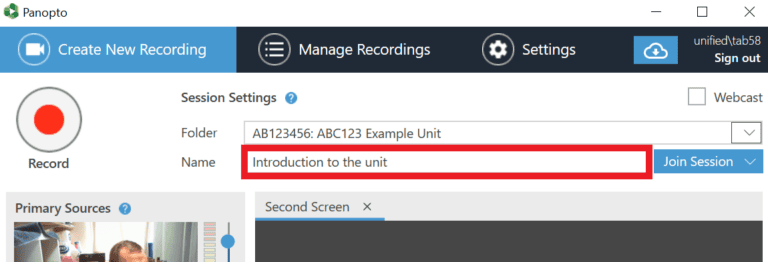
Choose an appropriate name for the recording
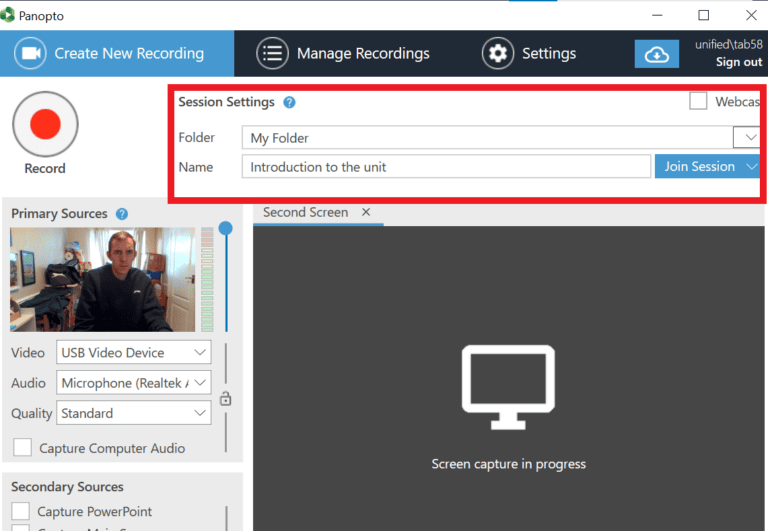
Start and stop the recording.
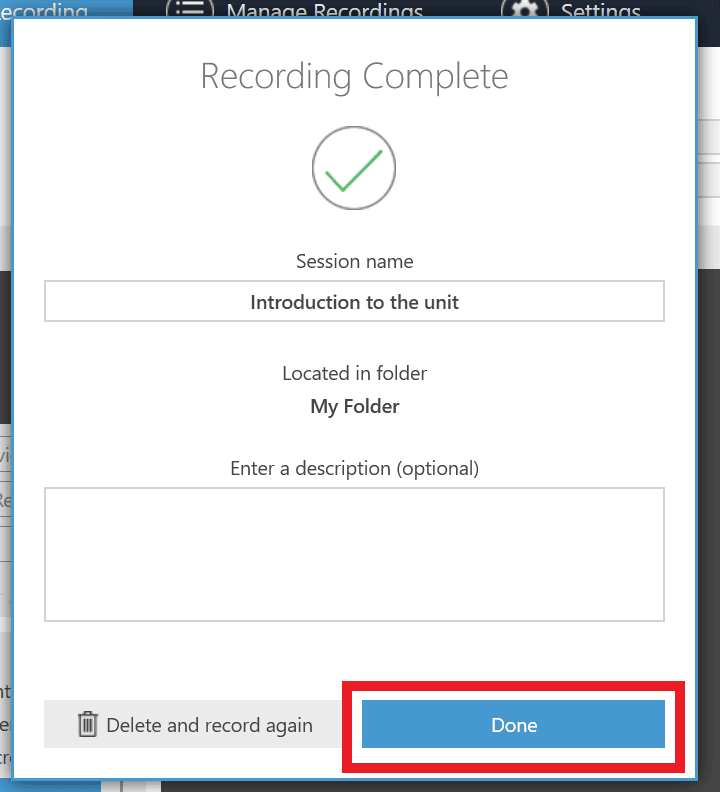
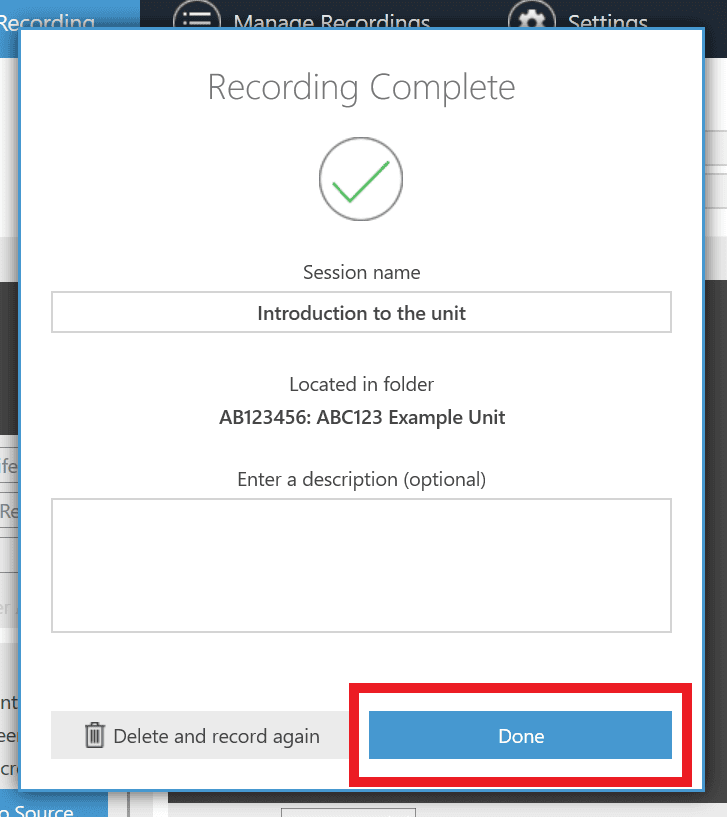
A Recording Complete box will appear. Click Done if you are happy with the recording.
Log into Panopto and navigate to My Folder.

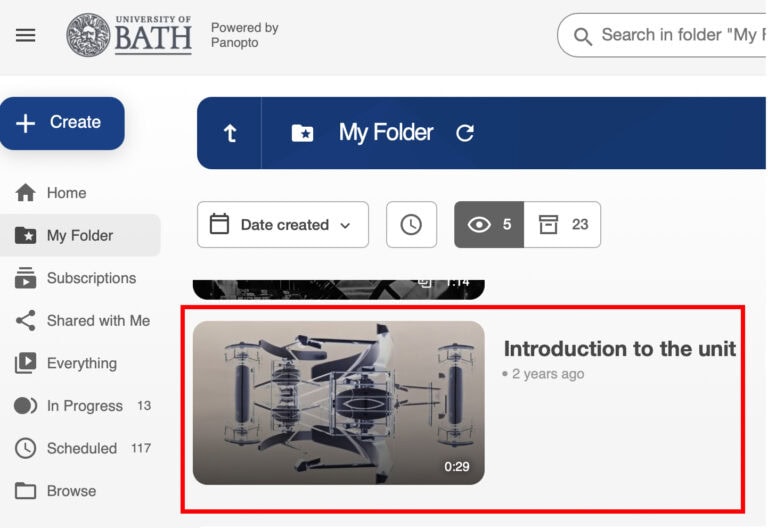
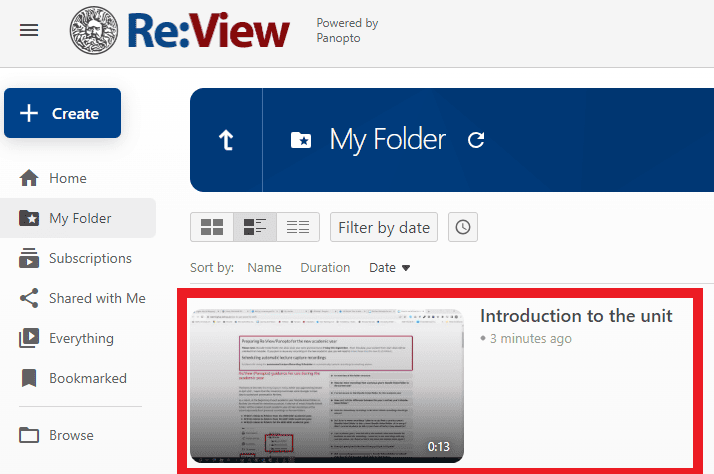
Once processed, the recording will appear in My Folder. At this point you can perform any editing before making it available to students.
To make the recording available to students, you need to move it to the appropriate Moodle-linked folder.
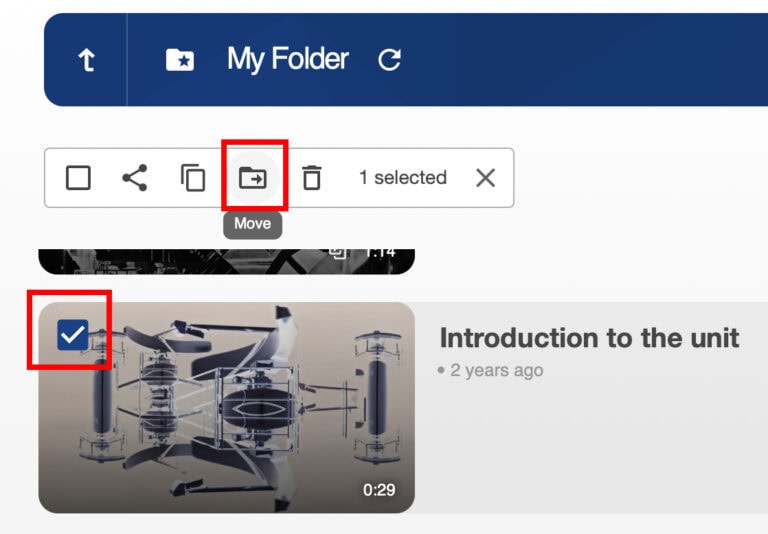
Hover over the recording and click on the checkbox that appears in the top-left hand corner of the preview image. Click on the Move button that appears in the menu above.
You can also click on the checkbox on multiple recordings if you wish to move several at once to the same folder.
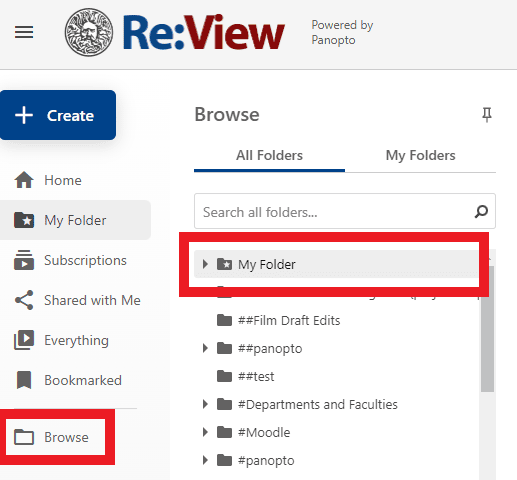
Either use the drop-down menu to find the appropriate Moodle-linked folder from the set of folders you have access to.
Or search for a folder using the search bar.
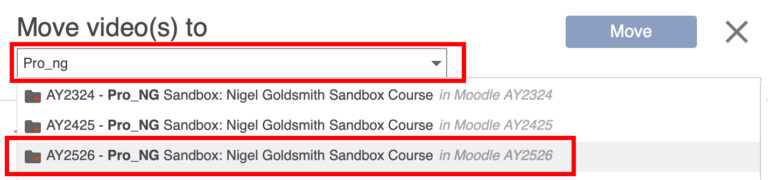
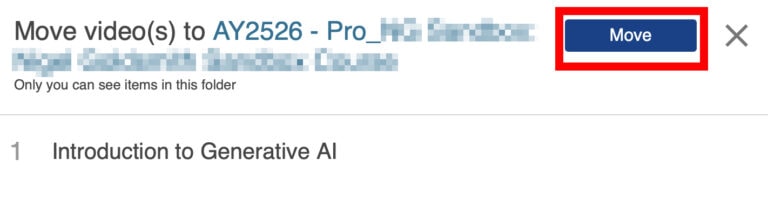
Click on the appropriate folder. Ensure that it is not a folder from a previous academic year. Then click Move to begin the process.
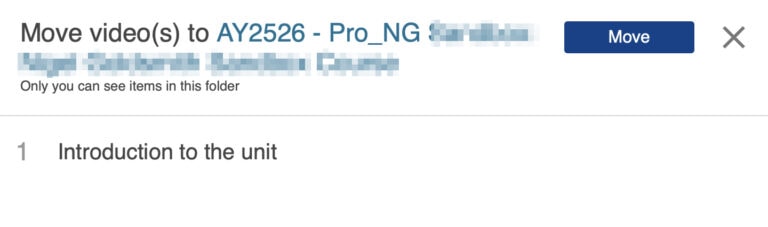
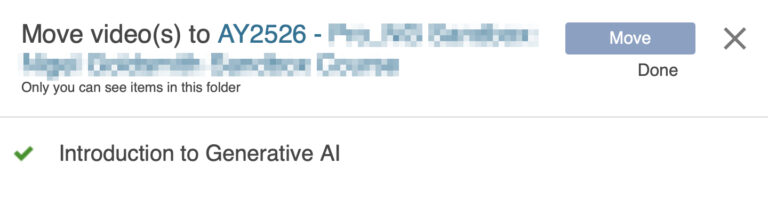
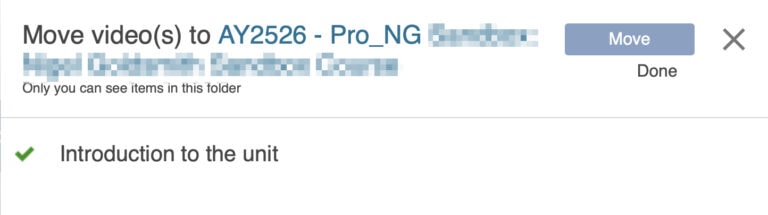
A green tick and Done will appear once the recording has been moved. You can then navigate to the appropriate Moodle-linked folder to view the recording in its new place.
Option 2 – Upload from Panopto desktop recorder to a Moodle-linked folder.
This option is appropriate when you wish to make the recording available to students immediately after recording.
Open the Panopto desktop recorder. Guidance about how to download and use the Panopto desktop recorder can be found on Panopto’s website.
Search or navigate to the Moodle-linked folder for the current academic year from the drop-down menu.
Choose an appropriate name for the recording.
Start and stop the recording.
A Recording Complete box will appear. Click Done if you are happy with the recording.
Log into Panopto and navigate to the appropriate Moodle-linked folder.
Once processed, the recording will appear in the Moodle-linked folder and will be available to students immediately.
Pre-record content on other recording software and save a recording to a Moodle-linked folder.
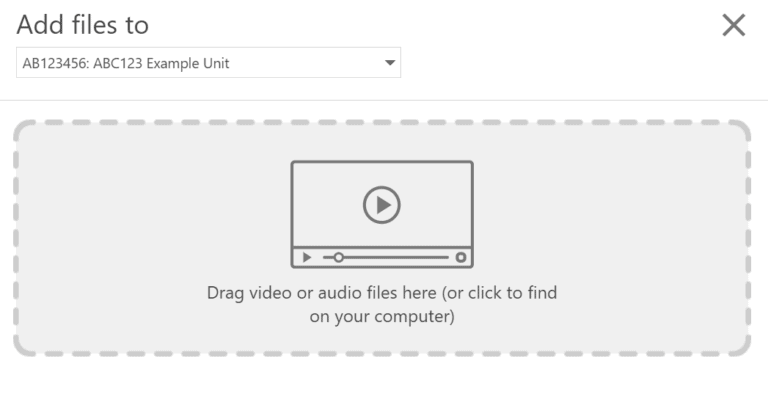
If you are recording on other software, for example a tablet or your own purchased software, you will need to upload the recorded content to the Moodle-linked folder for your unit for students to view it. This folder has the same name as your Moodle page and sits within the #Moodle AY2526 folder structure for the 2025-2026 academic year.
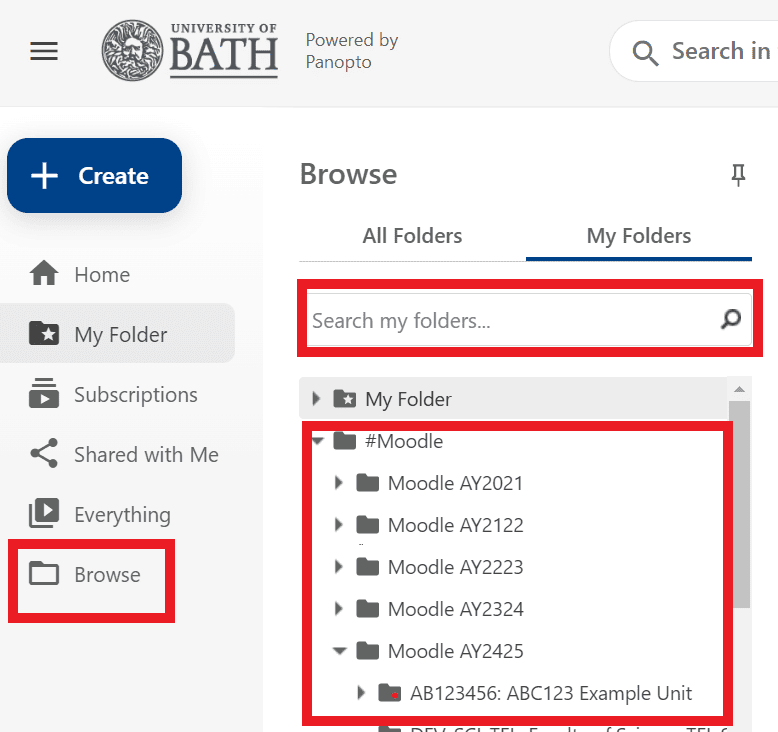
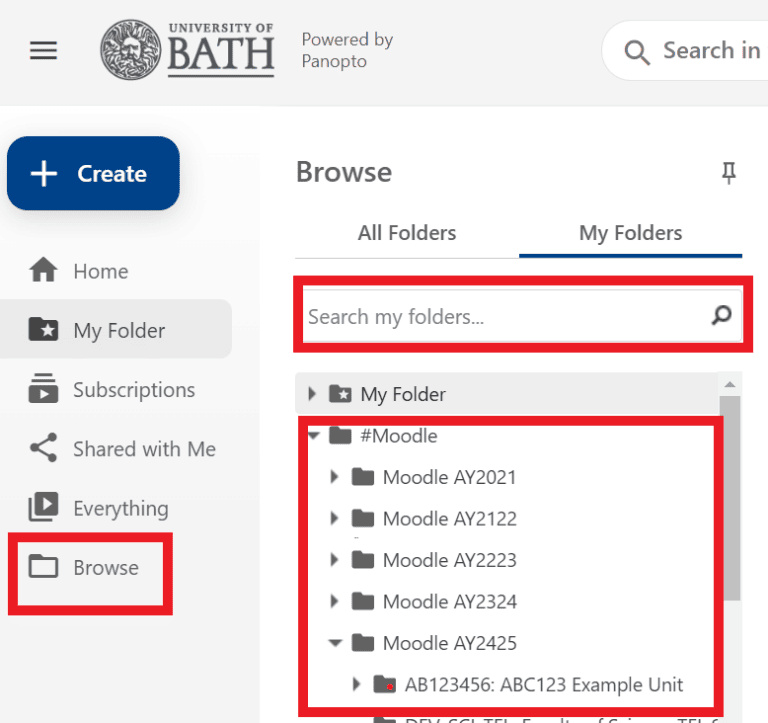
Log into Panopto and navigate to the Moodle-linked folder for the current academic year. One way to do this is by choosing Browse > #Moodle > #Moodle AY2526 > The Moodle-linked folder for the unit.
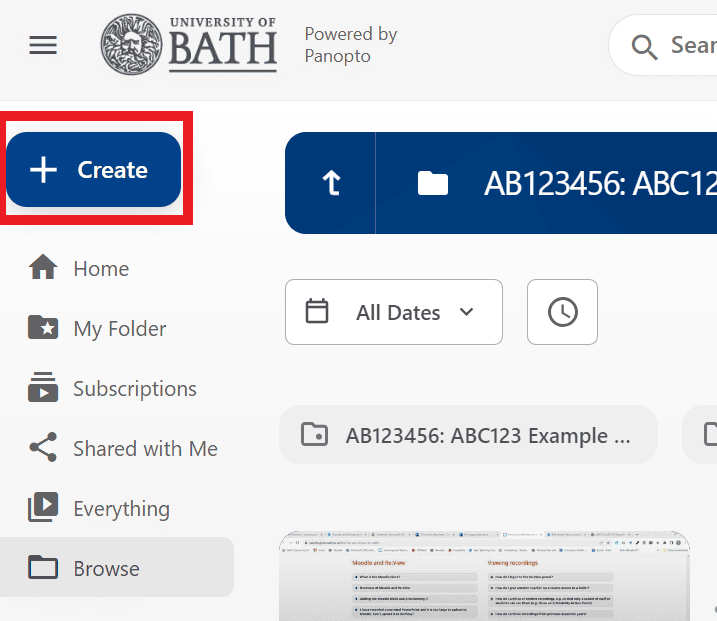
Next click the blue Create button.
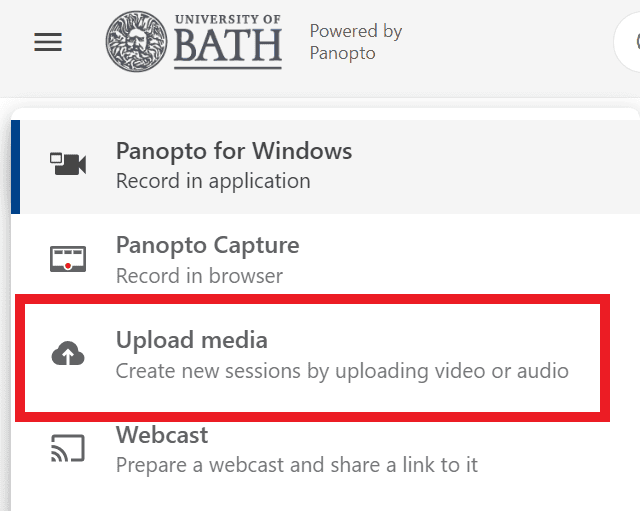
Select Upload media.
At this point, a pop-up will appear. Click within the dotted box to choose a recording from your computer.
Once you’ve chosen a recording from your computer, it will begin to process. This may take a few minutes.
Once processed, a green tick will appear and you can close the pop-up box using the x in the top right corner.
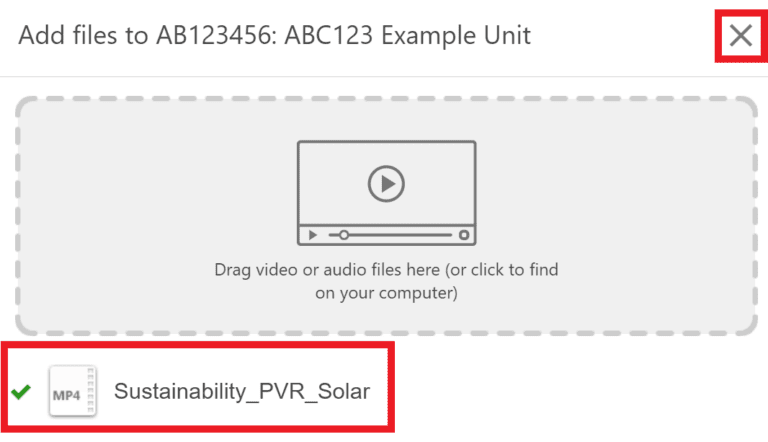
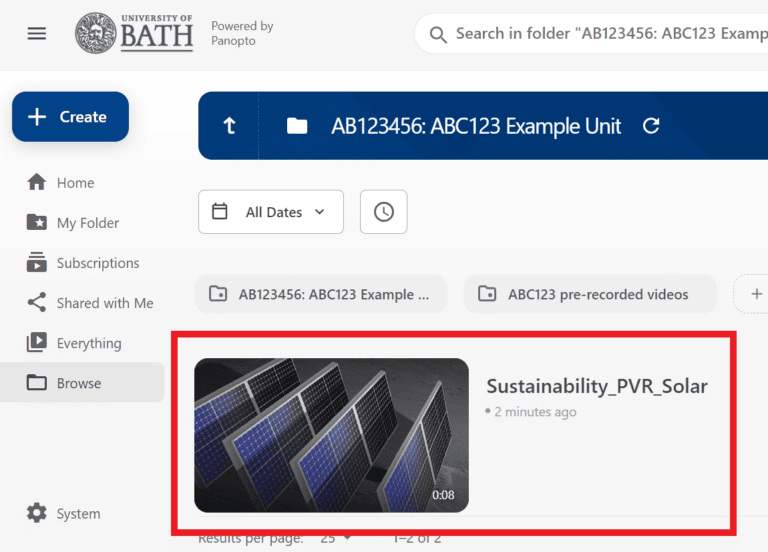
Once you have closed the pop-up box, you will notice your recording has been uploaded to the Moodle-linked folder.
Panopto’s website has further guidance about how to upload recordings.
Record an online teaching session on Zoom and save the recording to a Moodle-linked folder.
- Log into Panopto.
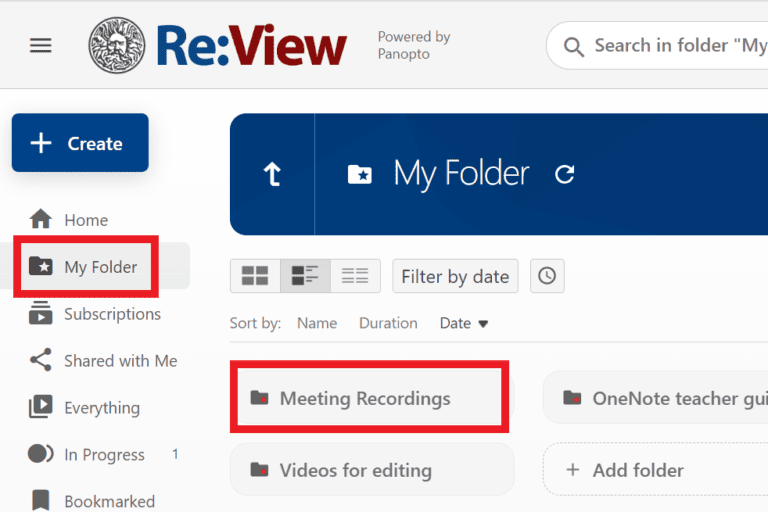
- Click My Folder on the left-hand side.
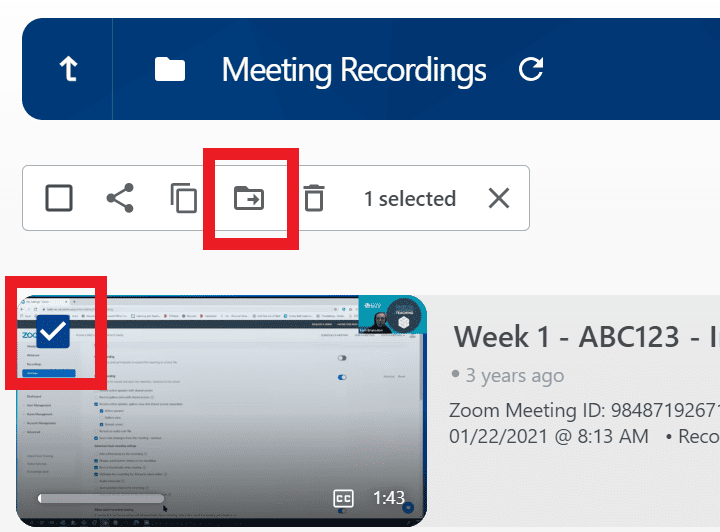
- Click on the Meeting Recordings sub-folder. The Zoom recording will appear in the sub-folder once it has been processed.
- Edit the recording (optional) and move it to the Moodle-linked folder. You must have creator permissions on the folder you are moving the recording to otherwise you won’t see the folder when searching. If you do not have creator permissions then you need to be added to the Moodle page and log into the Moodle page so that these permissions pull through to Panopto.
To move the recording, follow these steps:
- Hover over the recording and click on the checkbox that appears in the top-left hand corner of the preview image. Click on the Move button that appears in the menu above.
- You can also click on the checkbox for multiple recordings if you wish to move several at once to the same folder.
Either use the drop-down menu to find the appropriate Moodle-linked folder from the set of folders you have access to.
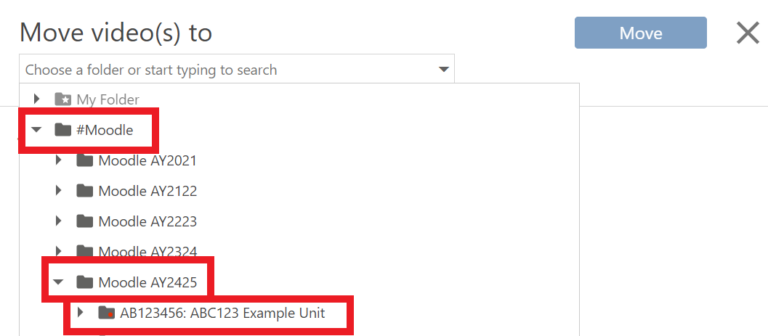
Or search for a folder using the search bar.
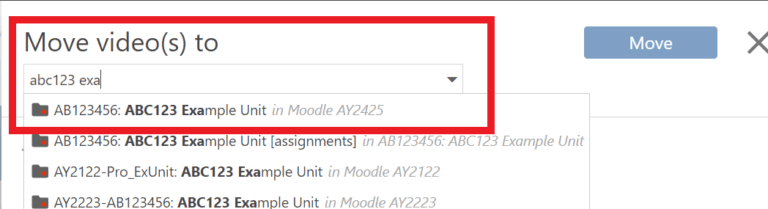
Click on the appropriate folder. Ensure that it is not a folder from a previous academic year. Then click Move to begin the process.
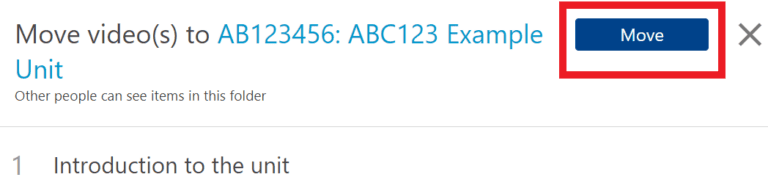
A green tick and Done will appear once the recording has been moved. You can then navigate to the appropriate Moodle-linked folder to view the recording in its new place.
Scheduled Lecture Recordings
Panopto can be used in GTA (General Teaching Area) rooms to capture lectures and other classroom activities. The University of Bath offers an opt-in teaching capture policy. Teaching staff can schedule automatic recordings using the scheduling tool.
Staff are expected to save the recording to the Moodle-linked folder in line with the workflow used since September 2021. Recordings will be visible alongside all other recordings made for the unit. For this there are two common workflows, depending on which folder you have scheduled the recording to be saved to.
- If the scheduled lecture recording is saved to the Moodle-linked folder for your unit, there is no need to take any further action.
- If the scheduled lecture recording is saved to My Folder, then move it to the Moodle-linked folder for your unit.
Scheduled lecture recordings will automatically be made available 24 hours after the recording took place.
Move a recording from My Folder to a Moodle-linked folder
Log into Panopto and navigate to My Folder.
Locate the recording you wish to move from your personal My Folder.
To make the recording available to students, move it to the appropriate Moodle-linked folder.
Hover over the recording and click on the checkbox in the preview image’s top-left-hand corner. Click on the Move button that appears in the menu above.
You can also click on the checkbox on multiple recordings if you wish to move several at once to the same folder.
Either use the drop-down menu to find the appropriate Moodle-linked folder from the set of folders you have access to.
Or search for a folder using the search bar.
Click on the appropriate folder. Ensure that it is not a folder from a previous academic year. Then click Move to begin the process.
A green tick and Done will appear once the recording has been moved. You can then navigate to the appropriate Moodle-linked folder to view the recording in its new place.
Upload a Microsoft Teams recording to Panopto
Zoom is the recommended platform for online teaching due to its integration with Moodle, and functionality for recordings to be automatically saved to Panopto. There may be occasions when a recording is made in Microsoft Teams and later uploaded to Panopto. In this scenario, the meeting organiser can find the Teams recording in their OneDrive and download it to their computer. After downloading it to their computer, they should upload it to Panopto.
If the meeting organiser cannot find the recording on their OneDrive, they should contact the IT/AV Service Desk for support.