
Published on: 07/07/2026 · Last updated on: 07/07/2026
Introduction
Level 1 Reasonable AdjustmentIn addition to video, Panopto can also accommodate audio-only resources, which at times may be more suitable for teaching or learning needs. Read more in our guide Podcasting and audio-only alternatives to video.
Ways to add audio to Panopto
You can record directly using Panopto or upload audio recorded elsewhere. Placing your audio files in Moodle-linked folders will ensure the right audience (staff and students) can access the resources.
Panopto Capture
Panopto Capture found in the Capture Menu is simple to use for quick recordings. Navigate to the folder where you want to store the audio. From the blue Create button select Panopto Capture (record in Browser)
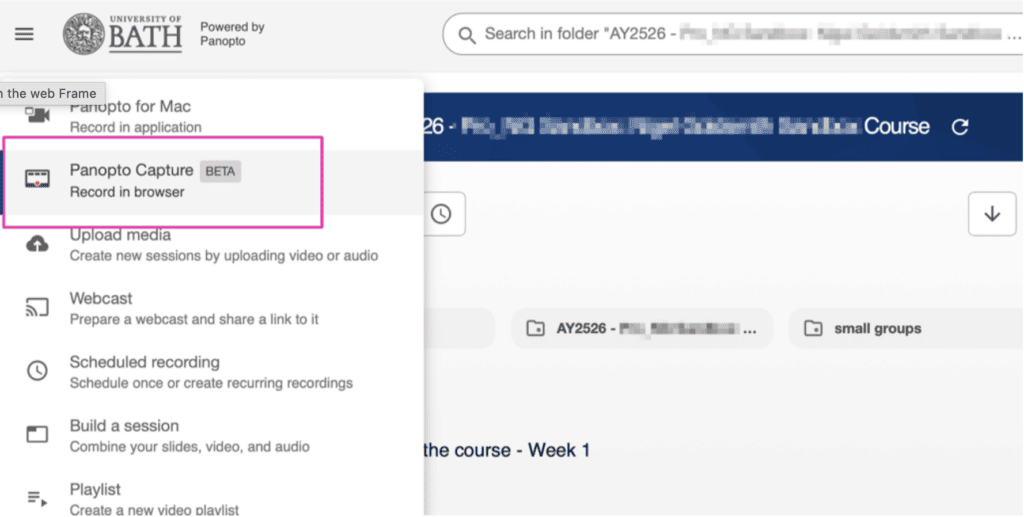
In the Panopto Capture window you can toggle the camera off by clicking on the video button at the top.
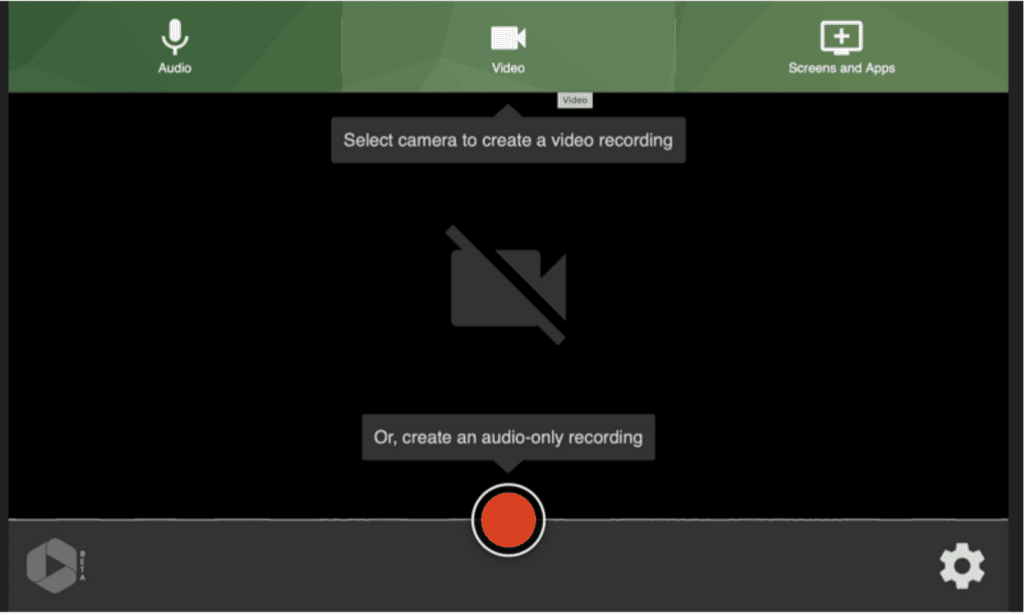
You can now click on the red record button to make an audio-only recording.
Panopto Recorder App
The desktop version of Panopto offers more features than Panopto Capture such as the ability to pause and resume a recording. The Panopto Recorder app can be downloaded from the Create menu. You may have to sign in to your Bath account when you first open the app. Click Create New Recording and select the appropriate folder where you want to store the recording. In the Primary Source panel, select an audio source and leave Video set to None. In Secondary Sources you can leave it as None or add a screen or PowerPoint presentation.
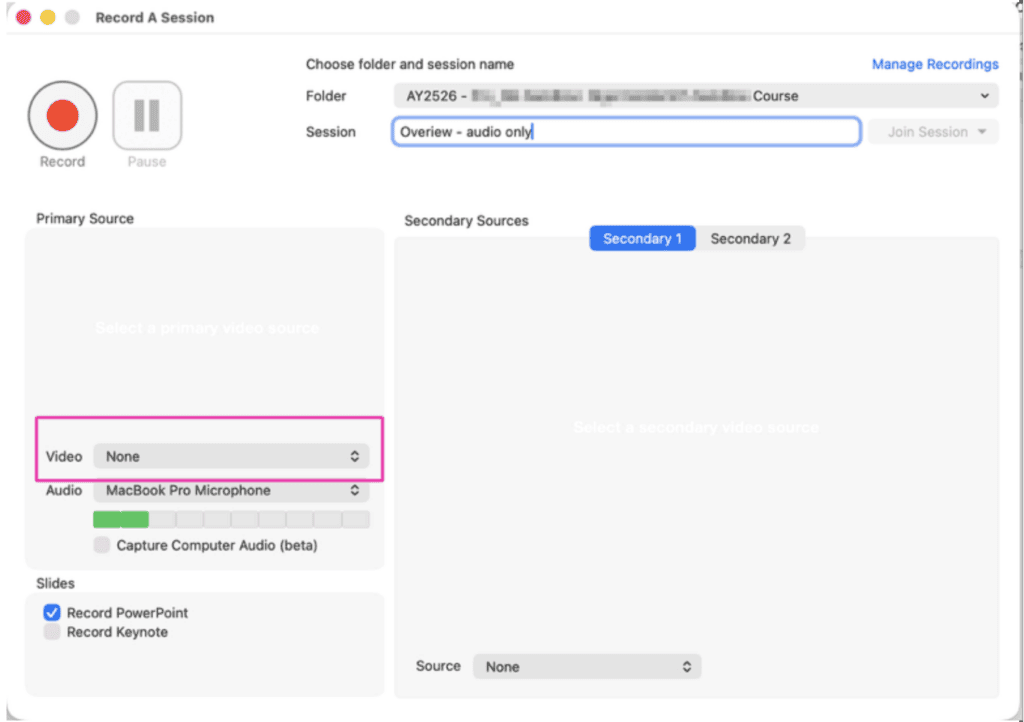
Click the red record button. You can pause and resume the recording if needed. When finished recording click the stop button, rename the session and click Upload.
Upload audio
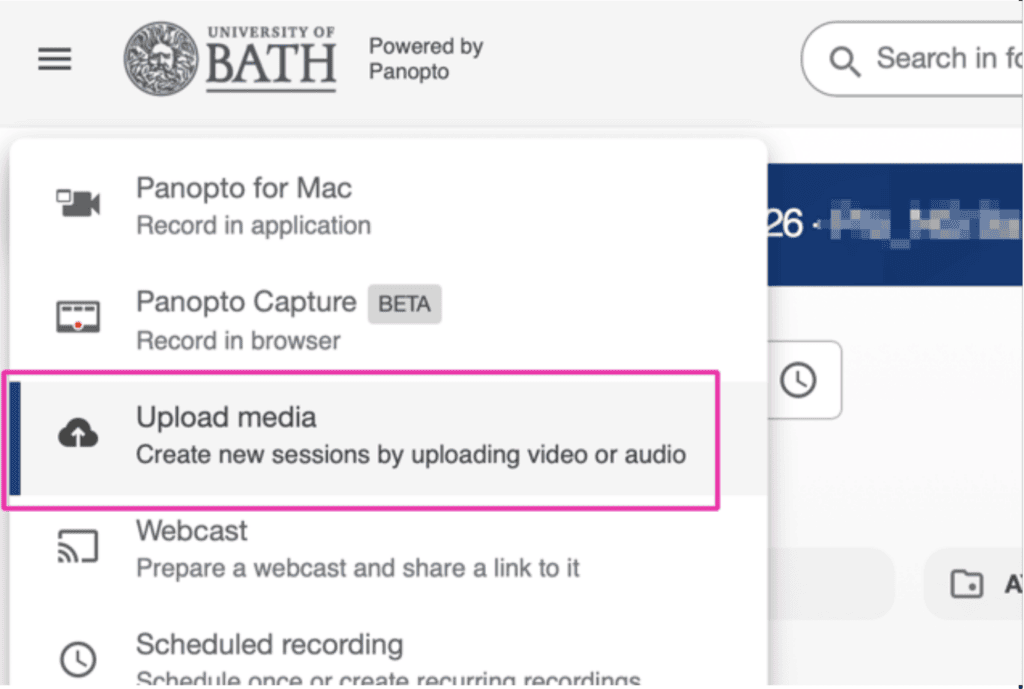
You may be comfortable using your smartphone to record audio or using a desktop app such as Windows Sound Recorder or Audacity. Any mp3 files you generate from such recordings can be uploaded to Panopto so students can access. Navigate to the folder where you want to store the audio. From the Create button select Upload media. Drag the .mp3 file on to the Add files popup area, or click and then search for the file.
Audio recording and automated captions
Panopto creates automatic captions for your audio resources. We recommend that captions are checked for accuracy. To edit captions, hover the cursor over the recording in Panopto and click on the Edit button. In the box on the left, click on the Captions button.
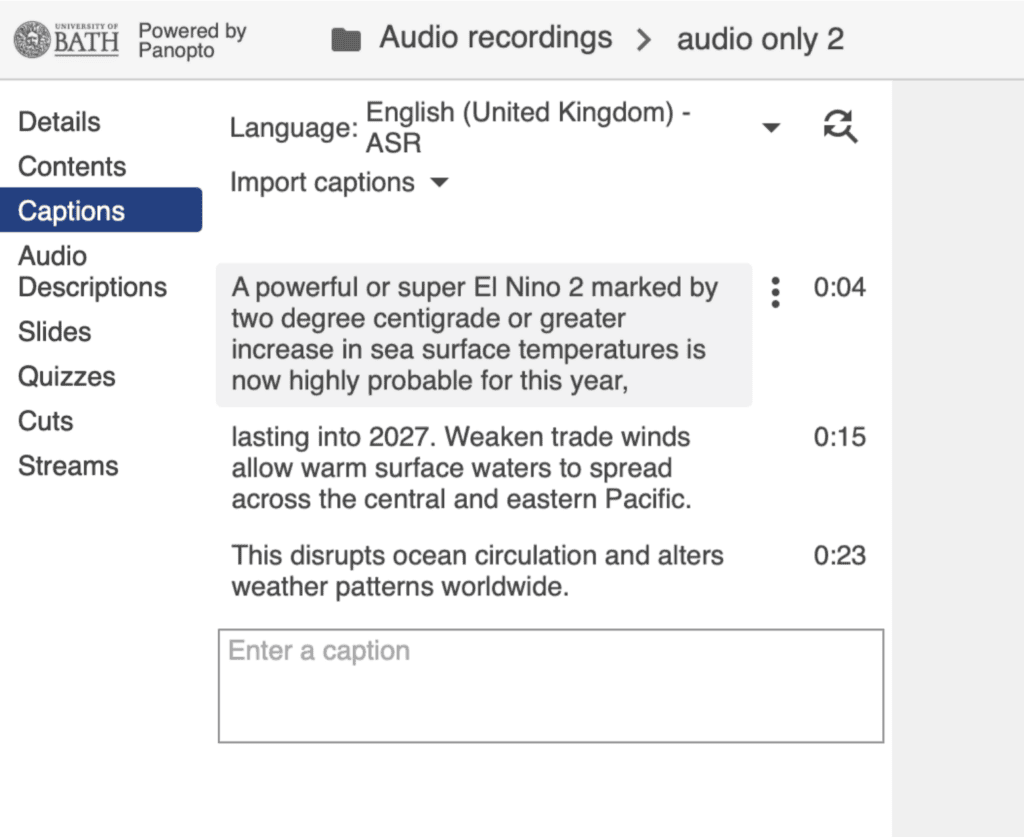
You can click directly into the captions to make corrections and then click on the ‘Apply’ button to confirm.