
Published on: 25/06/2026 · Last updated on: 25/06/2026
Introduction
When you create accessible markdown or LaTeX outputs you will generate a HTML site. There will many files including HTML, javascript, CSS pages with additional images and files assets. This guidance shares how you can host this content in Moodle as a mini-site that is easy for students to access.
Guidance steps
1. Zip your source HTML folder
After generating your HTML output, zip the entire folder including all HTML, CSS, attachments, etc to a single zip folder.
2. Add a new File Activity in Moodle
Go to Moodle and with Editing turned on, select Add a New Activity and select a new File Activity in Moodle. Do not select a Folder activity.
3. Configure the File Activity
Fill in the Name and Description fields with a descriptive name and concise description.
4. Upload and unzip the file in Moodle
Upload the zipped file you created in Step 1 to Select Files and select Upload this File.
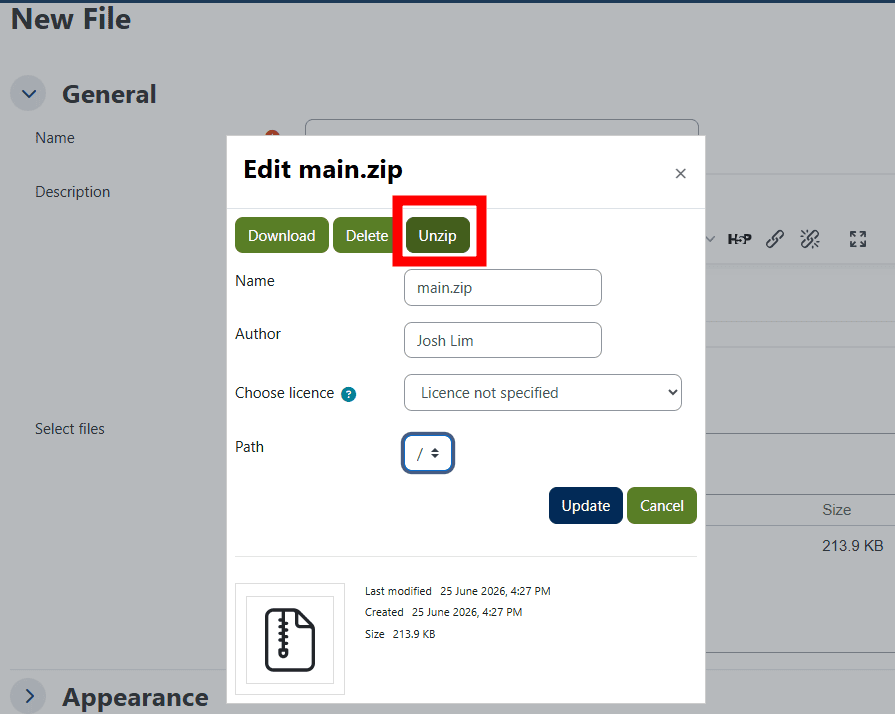
Select/click on the File you have uploaded, which will open a new dialogue window. Select the unzip button.
5. Set the main index file
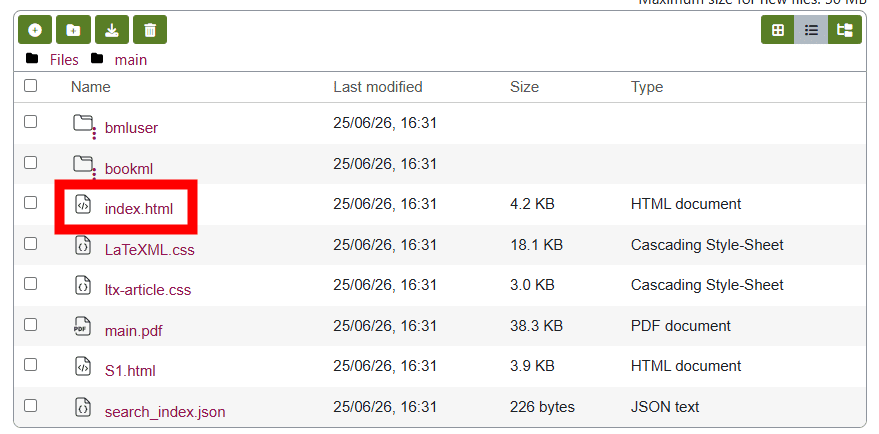
Navigate through any folder structure you have to find the home page for your mini-site. This will often be named index.html or main.html.
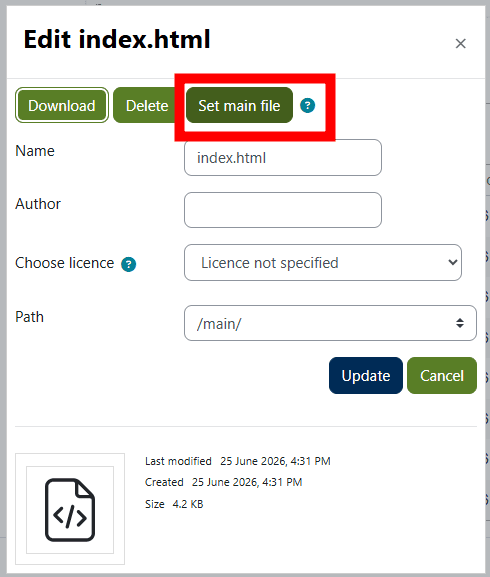
Select the home page (e.g. index.html) and in the new dialogue window select Set Main File.
6. Save changes
Select Save and Return to Course.
7 View minisite
Navigate to your new activity in Moodle. By default this will launch the mini-site in it’s own window (without the Moodle headers).
Making updates to your mini-site
Unfortunately, there is not a fast way to update certain elements of your site only. In general we recommend using steps 4-7 to replace the existing files.
Accessibility of your mini-site
The Accessibility+ toolkit is not able to look at the accessibility of any mini-sites hosted on Moodle. We advise you follow the SCULPT accessibility principles and approaches detailed in Introduction to accessible STEM Content.