Published on: 14/09/2023 · Last updated on: 11/09/2025
Introduction
Panopto can be used in GTA (General Teaching Area) rooms to capture lectures and other classroom activities. The University of Bath offers an opt-in teaching capture policy.
How to schedule a timetabled automatic lecture recording
Teaching staff can schedule automatic recordings using the scheduling tool (available on campus or via VPN). The scheduling tool allows teaching staff who are correctly listed in SAMIS Roles Admin Tool to schedule lecture capture recordings in any configured GTA (General Teaching Access) space according to events listed in the teaching timetable.
Important: If your single timetabled event is in more than one room at the same time, contact the IT/AV Service Desk to manually schedule lecture recordings on your behalf instead of using the scheduler.
To access the scheduler:
- Ensure you are either on campus, or if off-campus, you’ll need to connect via the University of Bath VPN.
- Enter into your web browser the address https://www.bath.ac.uk/review-scheduler/
- Sign in with your University username and password and then will be presented with the home screen.
- The page will list all of the units you are teaching on along with the events in date ascending order.
If you do not see a unit that you are teaching on, then check that you are correctly listed in the SAMIS Roles Admin Tool. If not, ask your programme admin team to add you.
You can filter the list by unit codes by entering in a comma-separated list. For example: MN10574, MN30371 will just display those events matching those codes.
In the first instance, the scheduler will attempt to map each activity with a default Moodle Folder in the Moodle AY2526 folder.
You may change this and pick from any folder in Moodle AY2526 you have creator permissions on either as an individual or group.
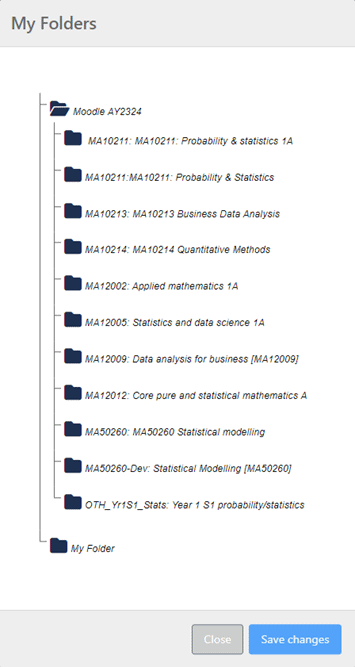
To select a folder for an activity, click on the folder icon button displayed below.

You will then be presented with a list of folders of which you have Creator permissions, either individually or as a group in Moodle AY2526. The folder the user selects will be indicated by the text turning green.
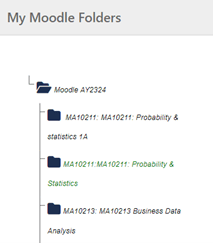
Save changes must be clicked to apply folder changes.
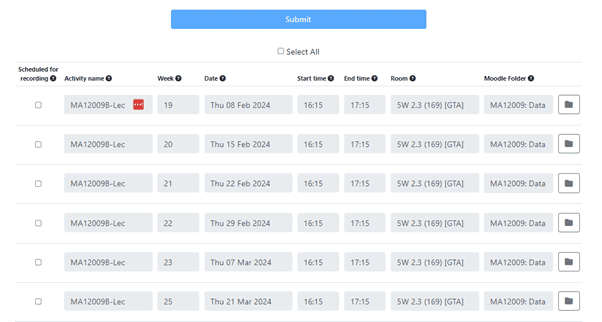
To mark events for scheduling, tick the box next to each event or tick the Select All box to select all events.
Once ticked, the events will be marked in yellow.
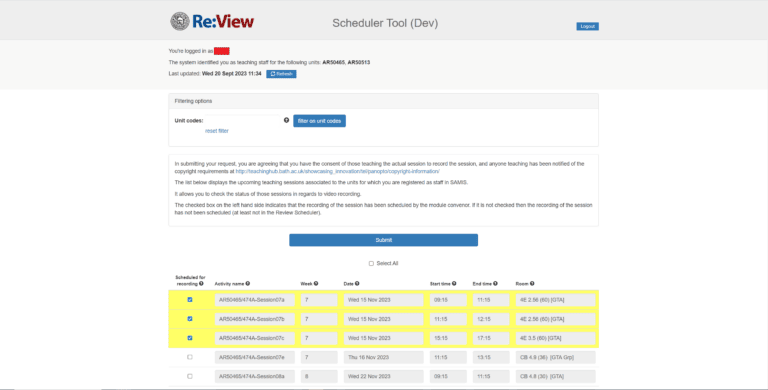
After reviewing the selection for errors, press Submit and the schedules will be set.

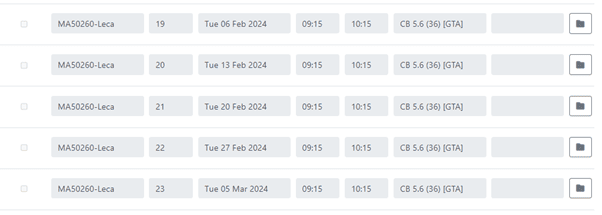
To unset the schedules, untick the events listed. They will again be shown in yellow indicating a change and press Submit to reverse the change:
Note that scheduled events are set to start recording at the start of the timetabled event (usually 15 minutes past the hour) and stop 5 minutes before the end, e.g. if the end time is listed as 16:15 it will actually end at 16:10 – this is important to note as it is to allow for changeovers.
Further important notes:
- If a unit consists of more than one member of staff who has lectures scheduled for automatic recording, ensure that your programme admin team has added all those teaching on the unit to the SAMIS Roles Admin Tool.
- You may have scheduled the recording to a folder outside of the Moodle-linked folder structure in Panopto. Once the recording has been processed, staff are expected to move the recording to the Moodle-linked folder for students to view it. This ensures that all lecture and pre-recorded content is in a single folder for students to access.
Recording manually in GTA spaces if a scheduled session fails
A manual recording system is still be available on teaching PCs. Staff can open the Panopto Capture in a browser to manually start, pause, and stop recordings. This is particularly useful if, for any reason, a scheduled session fails to record. Staff can also use Teams or Zoom. There is a limited choice of camera for any of these methods as some cameras are reserved for Scheduled Lecture Capture recordings.
Cancelled or rearranged lectures
If a lecture is cancelled or changes times due to unforeseen circumstances, then teaching staff need to untick the box in the scheduler to cancel the recording and click submit. As long as the session is cancelled +2 hours in advance, then the scheduler will adjust correctly.

If you are not available to cancel the recording:
Staff must communicate with Timetabling to remove their event from the timetable. As long as the session is moved +2 hours in advance, then the Scheduler will adjust correctly.
It is possible that a timetabled slot could be recorded without the session taking place – however, the indicator lights should be able to show when a room is ‘live’.
If a timetabled session which did not take place has been recorded (for example, the session was cancelled at the last minute due to staff sickness), then staff with Creator access on the relevant Panopto folder should delete the recording from Panopto.
Unable to see a folder in Panopto
If you are teaching on a unit and cannot see an appropriate folder in Panopto to record to, this could be because :
- You are not listed as a Teacher on the corresponding Moodle space. Ask another Teacher or Unit Convenor to enrol you on the Moodle space as a Teacher.
- You are not listed on that unit in SAMIS. Ensure that your programme admin team has added all those teaching on the unit to SAMIS.
Changing a previously scheduled recording to a Moodle-linked folder
Users can unschedule a previously scheduled recording. when they re-schedule they will have the option to re-schedule using a Moodle-linked folder they have available. A default folder will be mapped to the activity if possible.
Scenarios in which an activity cannot be mapped to a folder by default
If a unit is a multi-taught activity (an activity taught across multiple unit codes), then the scheduler will attempt to match muli-taught activities by searching for similar folders the user is a Creator on. If the scheduler cannot map a default folder to the activity, the user will have to choose a folder they have available in the folder selector tree.
How to schedule a non-timetabled automatic lecture recording
Unit Convenors, additional teachers, and a small number of users outside this scope can schedule recordings for non-timetabled activities using the scheduler.
To access the scheduler:
- Ensure you are either on campus, or if off-campus, you’ll need to connect via the University of Bath VPN.
- Enter into your web browser the address https://www.bath.ac.uk/review-scheduler/
- Sign in with your University username and password and then will be presented with the home screen.
- The page will list all of the units you are teaching on along with the events in date ascending order.
If you are a member of academic staff and cannot access the scheduler, then check that you are correctly listed in the SAMIS Roles Admin Tool. If not, ask your programme admin team to add you.
If you are a member of non-academic staff and have been added to the ‘additional schedulers’ list, and it is not functioning correctly for you – please raise an IT support ticket.
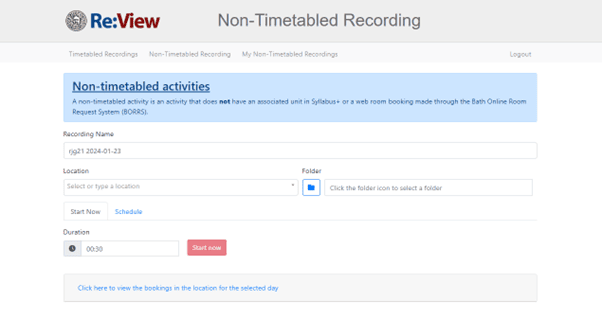
A recording name will be populated by default which users can rename up to 50 characters. A location can be searched for and will dynamically update to filter results. The location name is displayed followed by the recorder name attached to that location.
The following abbreviations apply to the locations:
- EVE (Evening)
- W/E (Weekend)
- GTA (General Teaching Area)

Users will be able to select a folder on which they are a Creator either as a group or as an individual within the Moodle-linked folder for the academic year, for example an AY2526 Moodle-linked folder. The user’s My Folder is also available for selection.
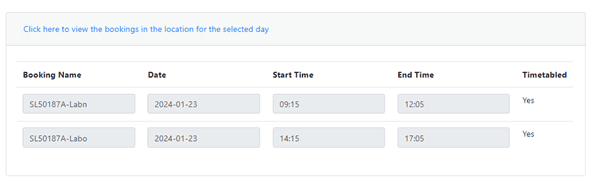
Users can view which activities are happening in a location for the given day by opening the tab Click here to view the bookings in the location for the selected.
Creating non-timetabled recordings
There are two variations of recording for non-timetabled recordings – a Start Now recording and a Schedule recording.
Start Now recording
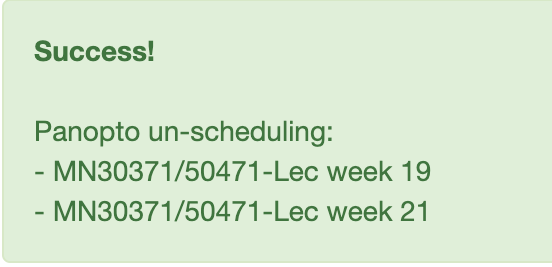
With a Start Now recording, after the initial information is provided (recording name, location, and folder) users can enter the duration length of the recording in the format (HH:MM). The recording will begin when the user clicks the Start Now button. The following success message will be displayed:

An important note is that it can take up to 20 seconds for a Start Now recording to begin, this can depend on the type of equipment in the room and when the equipment was last used.
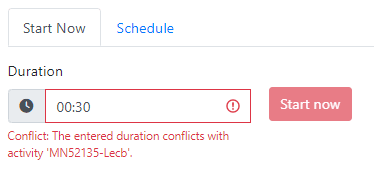
If a user attempts to create a Start Now recording that overlaps with a timetabled activity in Syllabus Plus, then the following error message will be displayed on the input field and the Start Now button will be disabled.
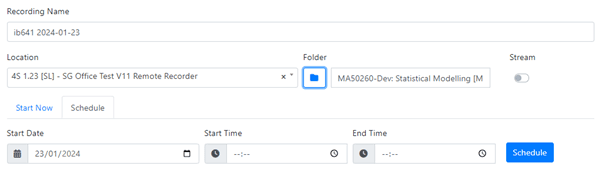
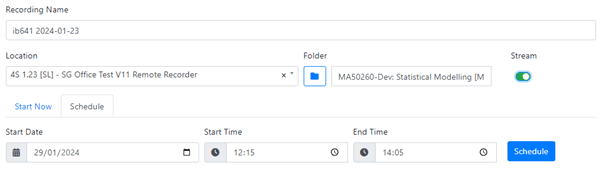
Schedule a recording
By clicking on the Schedule tab, the schedule non-timetabled recording form will appear. This includes the date, start time, and end time.
The following boundaries are set on the start date, start time, and end time.
- The earliest you can schedule a non-timetabled recording is 6am
- The latest you can end a scheduled non-timetabled recording is 10pm
- You can create a schedule recording up to 2 weeks in advance.
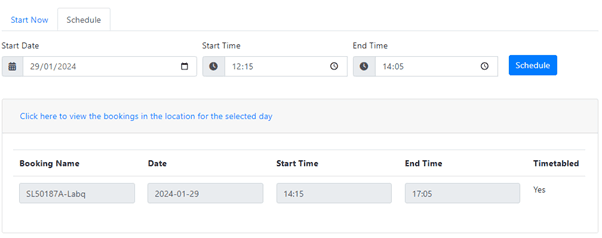
If the start time or end time overlaps with a timetabled activity you will get a conflict error message on the time input that is causing the overlap.

However, users can schedule around timetabled recordings as demonstrated below.
Streaming
Streaming for non-timetabled activities is being trialed and is available upon request. Users will be presented with a Stream toggle button which when toggled green will indicate the recording will be live streamed. After a stream has ended, it becomes a recording.
If successful, the user will be presented with a link to the stream that they can copy to their clipboard and share how they wish.

By following the link, the below page will display with the stream name.

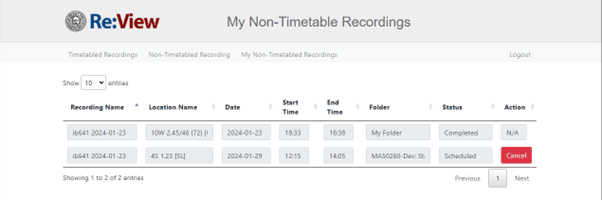
Managing non-timetabled recordings
Users can manage their scheduled non-timetabled recording through the My Non-Timetabled Recordings item in the navigation bar. Users can cancel recordings that have the status Scheduled. Alternatively, users can still manage their recordings directly through Panopto.
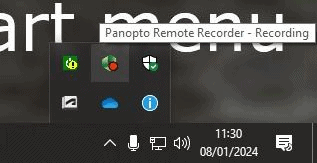
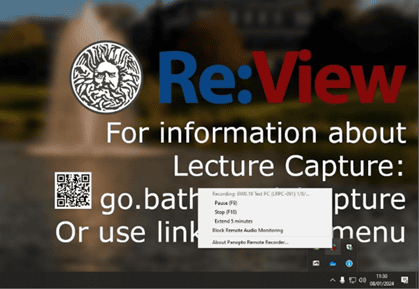
Pausing and resuming a non-timetabled recording
On the PC in the room, users can toggle pause/resume by pressing F9. Alternatively, in the bottom right-hand corner of the tray click on the upward arrow icon and right-click on the green Panopto logo to open the menu.