Published on: 14/09/2023 · Last updated on: 16/04/2026
Introduction
Panopto can be used in GTA (General Teaching Area) rooms to capture lectures and other classroom activities. The University of Bath offers an opt-in teaching capture policy. Teaching staff can schedule automatic recordings using the scheduling tool.
This article outlines the process for recording in GTA (General Teaching Area) spaces on the day of the recording.
What to do on the day of the recording
If you are using the scheduler, then you just need to turn up on time – the recording will take place automatically if it has been scheduled.
Wear a microphone in the room if there is a wearable one.
If the recording has not been scheduled but you still wish to record the teaching session, then open Panopto Capture in a browser on the Teaching PC. Manually start and stop recordings without the need to schedule them in advance.
Further guidance is available on laminated sheets next to the teaching room PCs. These differ from room to room. An example is displayed below.
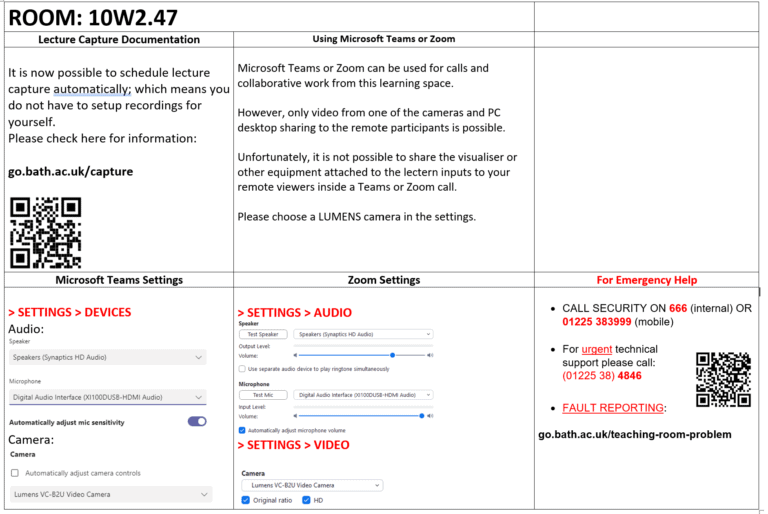
Download a Microsoft Word version of the room guidance sheet example.
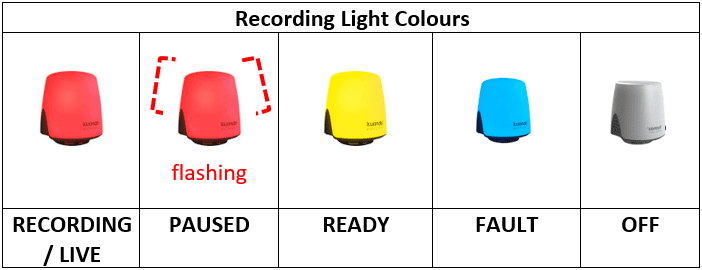
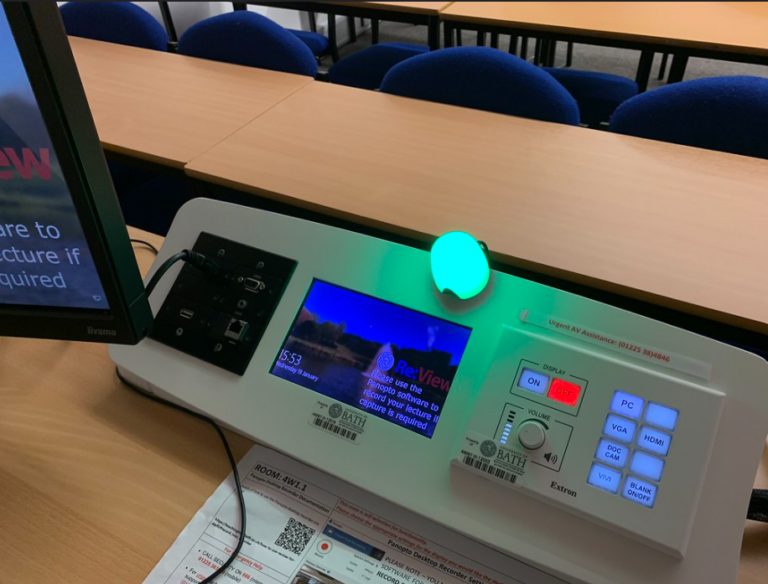
Recording indicator lights
Each room has indicator lights that indicate the status of the recording in a room.
- Red – Currently recording/Live
- Red (flashing) – Paused
- Yellow – Ready
- Blue – Fault
- No light – Not recording/off
Using a laptop to present
Staff can connect laptops through the cables on the top of the lectern, and select the appropriate input on the lectern controller.
Using Zoom/Teams whilst the scheduled recording is in progress
You can use Zoom/Teams whilst the scheduled recording is in progress. However, they can only share the dedicated conferencing camera and screen share from the local PC.
You WILL NOT be able to share any of the other projector inputs (e.g. visualiser, Vivi, HDMI) with your Teams or Zoom call whether a recording is taking place or not.
The dedicated conference camera is a webcam, usually mounted near the presentation area. The device to select will be documented in the printed guidance in the room. An example is displayed below.

Download a Microsoft Word version of the room guidance sheet example.
Recording manually in GTA spaces without scheduling
A manual recording system is available on teaching PCs. Staff can open Panopto Capture in a browser to manually start and stop recordings without the need to schedule them in advance. Staff can also use Teams or Zoom. There will be a limited choice of cameras.