
Published on: 11/02/2025 · Last updated on: 17/04/2026
What to do
- Always set column and/or row headers
- Avoid merged or split cells, nested tables, and blank rows or columns
- Add a caption to describe what the table shows
- Use tables for data only, not for layout
Why do it?
Tables are useful for presenting structured data, but inaccessible tables can be difficult or impossible to use with screen readers and other assistive technologies. Tables should only be used for tabular data, not for page layout (use other accessible layouts for this instead).
Users who rely on high zoom, small screens, or screen readers can easily “get lost” in poorly structured tables. Screen readers navigate tables one cell at a time and rely on clear headers and consistent structure to provide context.
Instructions for different platforms
Create accessible tables in Word
Follow these instructions for creating accessible tables in Word (includes a video and written guide).
Create accessible tables in Excel
Follow these instructions for creating accessible Excel tables (includes a video and written guide).
Create accessible tables in Moodle
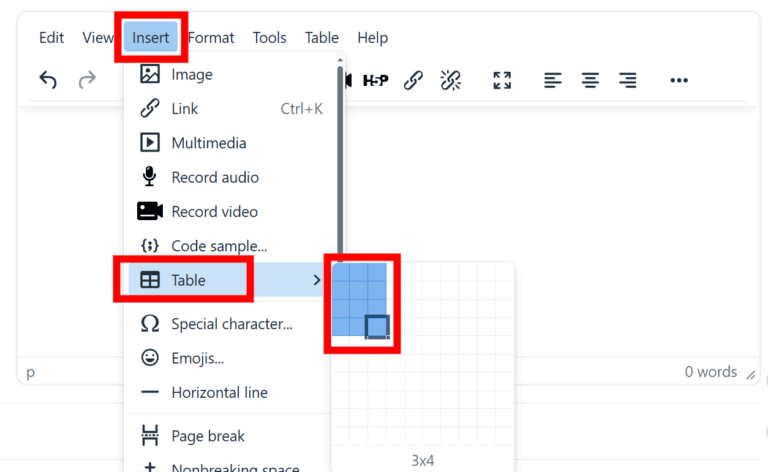
In the Moodle text editor, from the “Insert” menu, select “Table” and choose your table size.
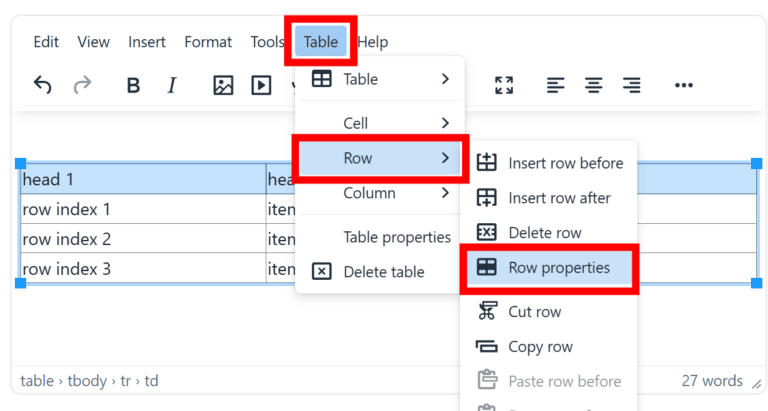
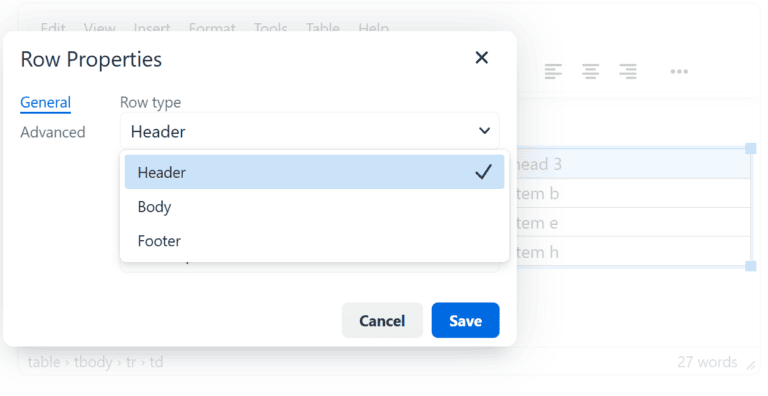
Set the first row as column headers (select the 1st row → then from the “Table” menu select “Row” →”Row Properties”, finally set “Row Type” →”Row Header”).
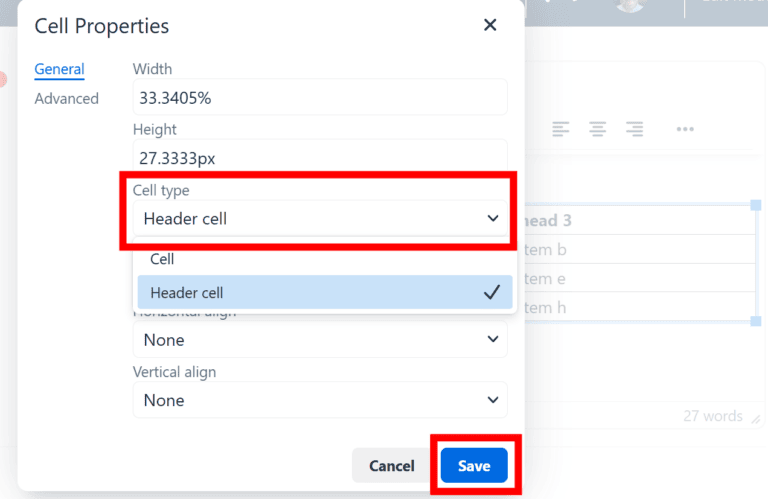
Select the first column as row headers (select the first column then from the “Table” menu select “Cell” →”Cell Properties”, finally set “Cell type” → “Header cell”)
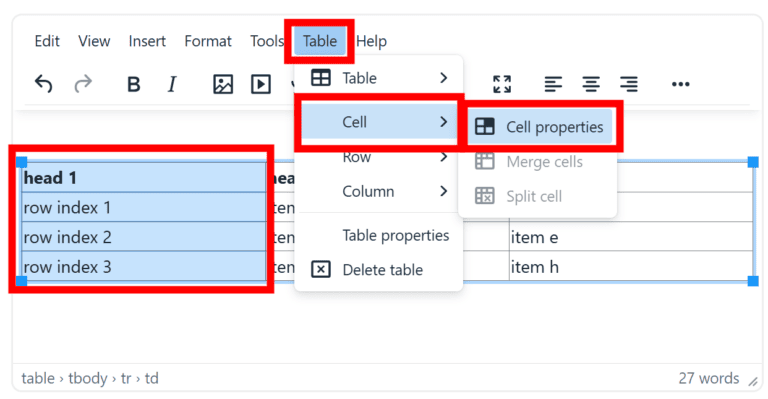
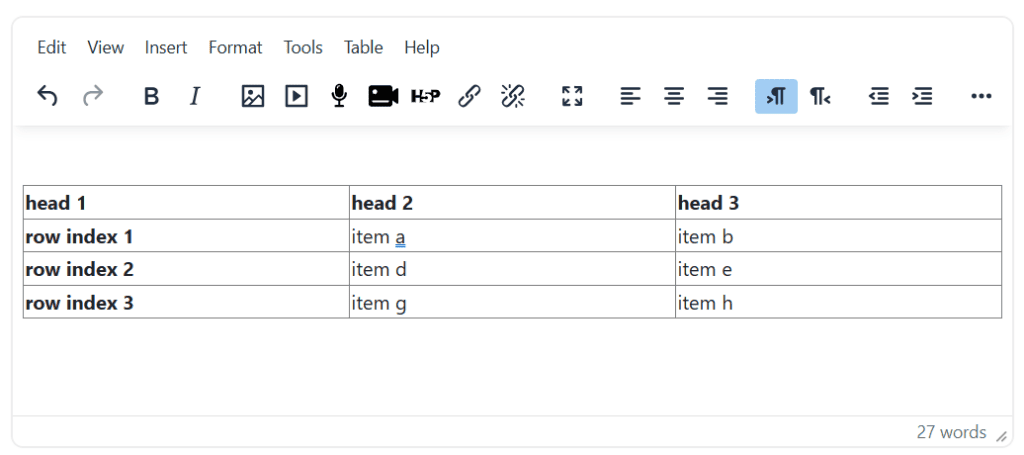
The finished table will have bold formatting on the column and row headings (pictured below).
How can I spot issues with tables?
- In Word, starting from the upper most left cell, press TAB to make sure all cells and rows are moved through in turn.
- Make sure to check your work – automatic accessibility checkers often fail to make appropriate checks on tables.