What is it?
The Accessibility+ Toolkit is a tool to help staff to find, fix and future-proof accessibility issues in their Moodle based content. The Accessibility+ Toolkit looks at the accessibility of learning materials that have been authored with the Moodle text editor (such as Moodle books, pages, activity descriptions and the question bank).
You can find the Accessibility+ Review block in the block drawer (collapsible pane on the right side of your Moodle space). Remember this block and the heatmap are only visible to Moodle Teachers and not Students. Click on the paper icon in front of each type of error (number 2) to find some accessibility tips and guides to enhance your content. Using the eye icon at the bottom (number 3) you can toggle on/off the heatmap displayed at your Moodle page.

How might I use it?
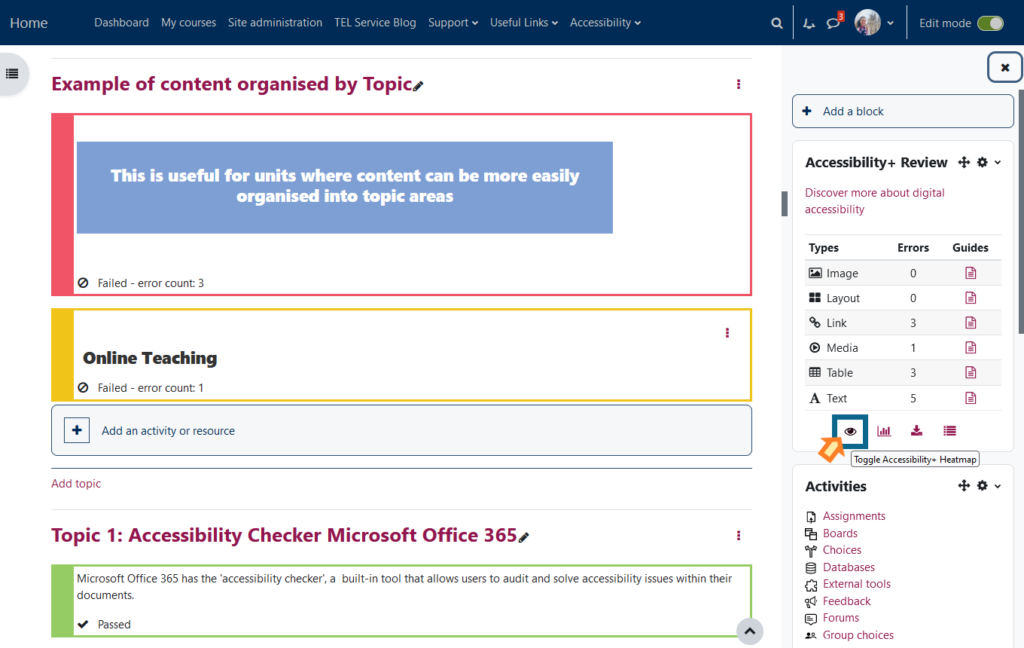
After completing the course analysis, the heatmap will be overlaid on your Moodle space. This colour codes all activities as “Passed” in green if there are no accessibility issues or amber/red if there are accessibility issues. Students never see the heatmap and this overlay can be hidden/displayed by clicking the eye icon in the Accessibility+ Review block.
Remember: the heatmap only checks content authored directly in Moodle. If an inaccessible Word document has been uploaded to Moodle, but an accessible description accompanies it, the heatmap will not flag any errors. You should use the Office365 Accessibility Checker to identify accessibility issues with documents.
Note: The heatmap and the block are not visible to students, but are specifically designed for course owners to identify areas that may require accessibility enhancements.
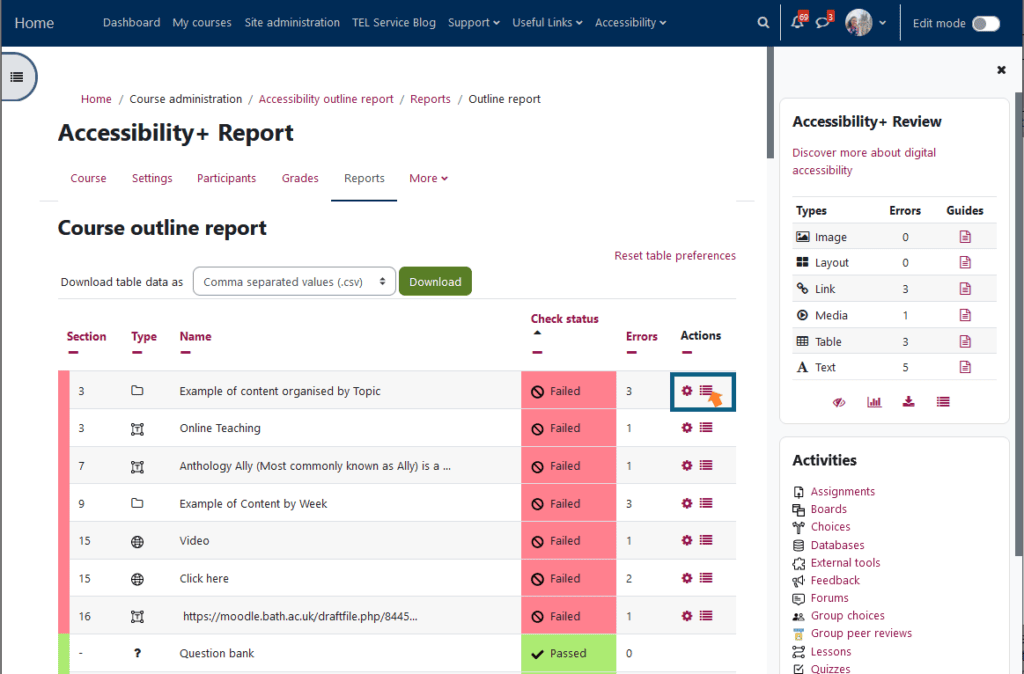
Clicking on the bullet list icon within the Accessibility+ Review Block menu will display an outline report similar to the image provided.
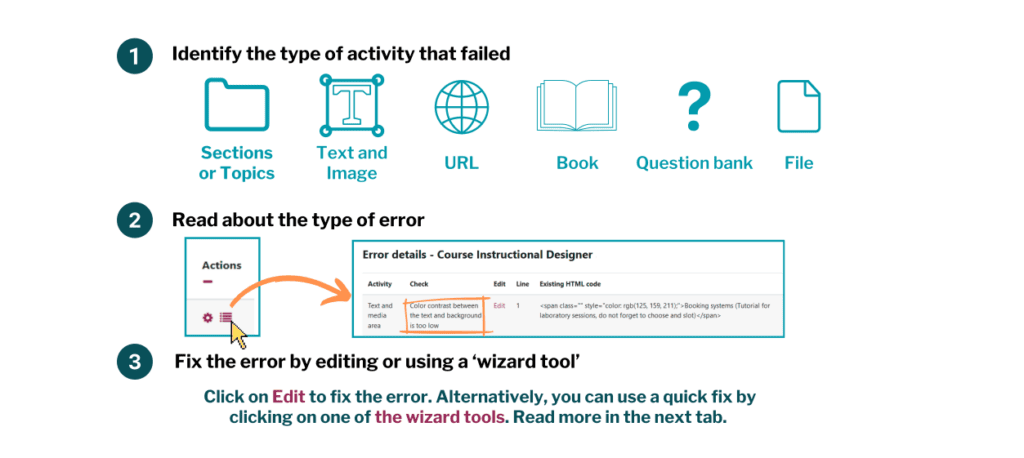
Using this report you can apply this 3 steps to fix the errors:
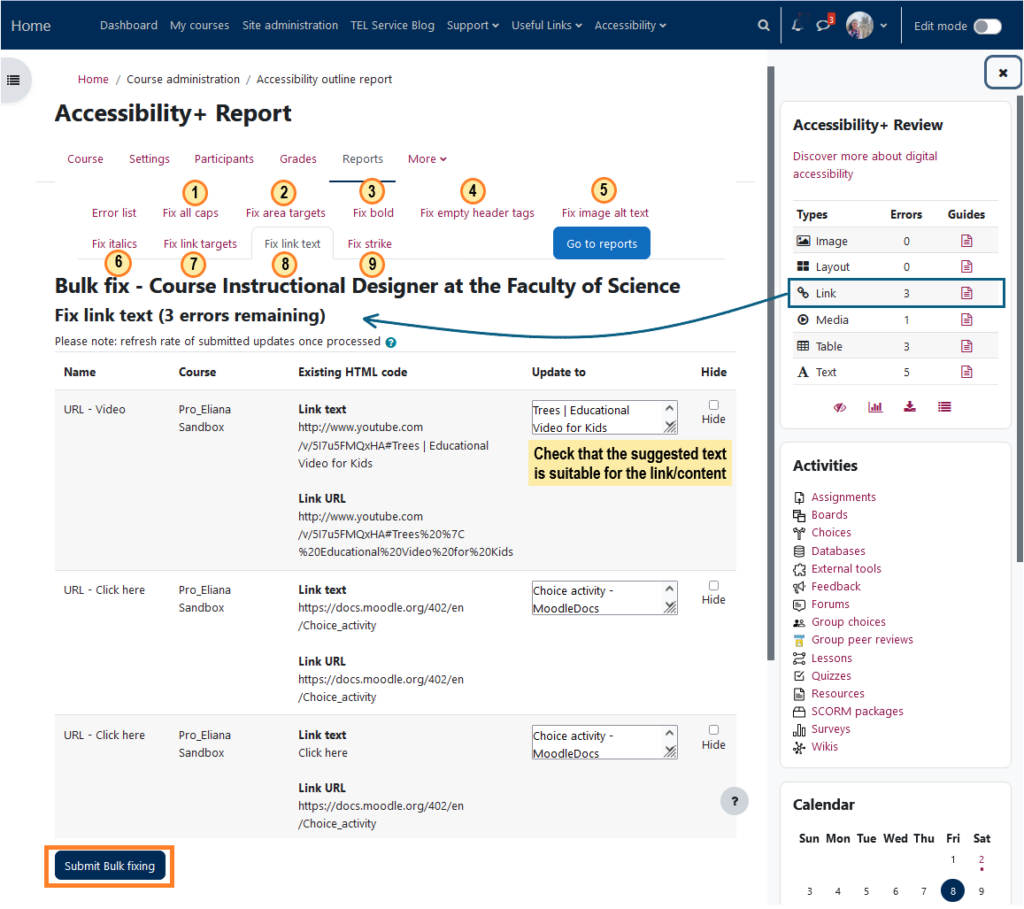
The Accessibility+ Toolkit conducts and reports on a wide variety of accessibility checks. Where issues are identified, the inbuilt wizards allow staff to apply fixes quickly and efficiently as part of a batch process. As in the case of the block, guides are available to provide on the spot accessibility hints and tips.
In the image below you can identify 9 wizard tools or quick fixes like:
- Fix all caps
- Fix area targets
- Fix bold
- Fix empty header tags
- Fix image alt text
- Fix italics
- Fix link targets
- Fix link text
- Fix strike