Published on: 26/01/2024 · Last updated on: 04/09/2024
Schedule a non-timetabled automatic lecture recording
Unit Convenors, additional teachers, and a small number of users outside this scope can schedule recordings for non-timetabled activities using the scheduler.
To access the scheduler:
- Ensure you are either on campus, or if off-campus, you’ll need to connect via the University of Bath VPN.
- Enter into your web browser the address https://www.bath.ac.uk/review-scheduler/
- Sign in with your University username and password and then will be presented with the home screen.
- The page will list all of the units you are teaching on along with the events in date ascending order.
If you cannot access the scheduler, then check that you are correctly listed in the SAMIS Roles Admin Tool. If not, ask your programme admin team to add you.
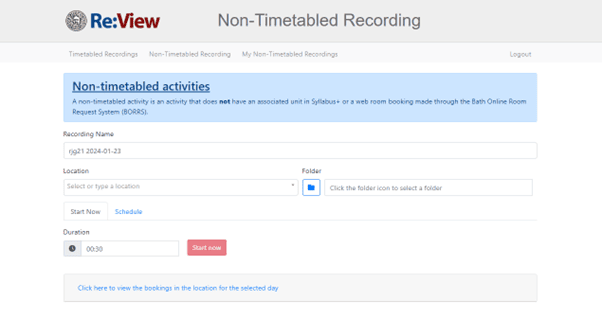
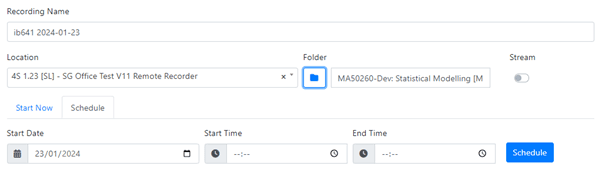
A recording name will be populated by default which users can rename up to 50 characters. A location can be searched for and will dynamically update to filter results. The location name is displayed followed by the recorder name attached to that location.
The following abbreviations apply to the locations:
- EVE (Evening)
- W/E (Weekend)
- GTA (General Teaching Area)

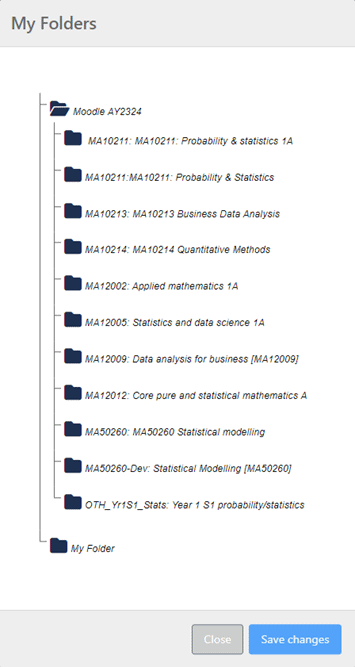
Users will be able to select a folder on which they are a Creator either as a group or as an individual within the Moodle-linked folder for the academic year, for example an AY2425 Moodle-linked folder. The user’s My Folder is also available for selection.
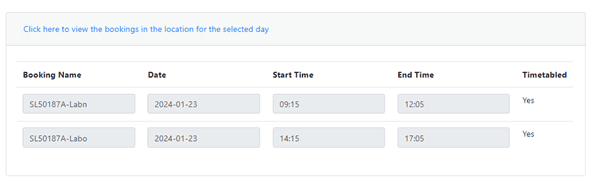
Users can view which activities are happening in a location for the given day by opening the tab Click here to view the bookings in the location for the selected.
Creating non-timetabled recordings
There are two variations of recording for non-timetabled recordings – a Start Now recording and a Schedule recording.
Start Now recording
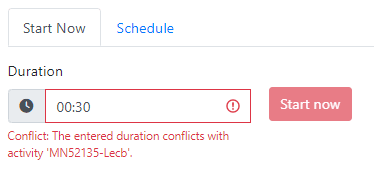
With a Start Now recording, after the initial information is provided (recording name, location, and folder) users can enter the duration length of the recording in the format (HH:MM). The recording will begin when the user clicks the Start Now button. The following success message will be displayed:

An important note is that it can take up to 20 seconds for a Start Now recording to begin, this can depend on the type of equipment in the room and when the equipment was last used.
If a user attempts to create a Start Now recording that overlaps with a timetabled activity in Syllabus Plus, then the following error message will be displayed on the input field and the Start Now button will be disabled.
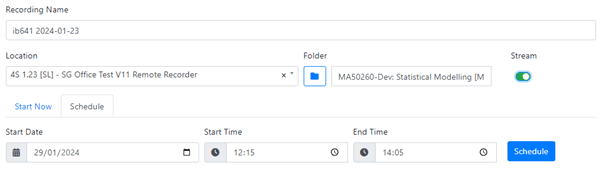
Schedule a recording
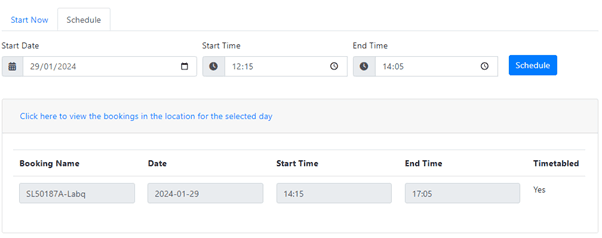
By clicking on the Schedule tab, the schedule non-timetabled recording form will appear. This includes the date, start time, and end time.
The following boundaries are set on the start date, start time, and end time.
- The earliest you can schedule a non-timetabled recording is 6am
- The latest you can end a scheduled non-timetabled recording is 10pm
- You can create a schedule recording up to 2 weeks in advance.
If the start time or end time overlaps with a timetabled activity you will get a conflict error message on the time input that is causing the overlap.

However, users can schedule around timetabled recordings as demonstrated below.
Streaming
Streaming for non-timetabled activities is being trialed and is available upon request. Users will be presented with a Stream toggle button which when toggled green will indicate the recording will be live streamed. After a stream has ended, it becomes a recording.
If successful, the user will be presented with a link to the stream that they can copy to their clipboard and share how they wish.

By following the link, the below page will display with the stream name.

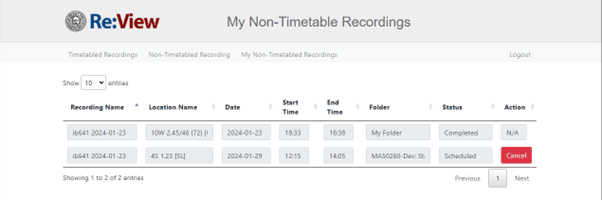
Managing non-timetabled recordings
Users can manage their scheduled non-timetabled recording through the My Non-Timetabled Recordings item in the navigation bar. Users can cancel recordings that have the status Scheduled. Alternatively, users can still manage their recordings directly through Panopto.
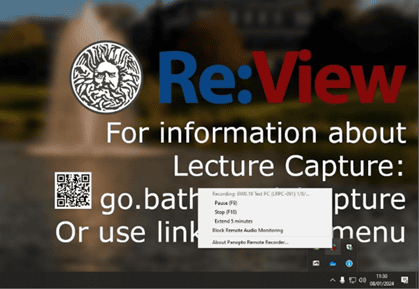
Pausing and resuming a non-timetabled recording
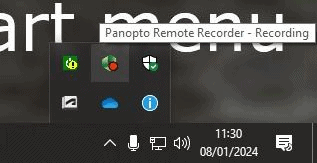
On the PC in the room, users can toggle pause/resume by pressing F9. Alternatively, in the bottom right-hand corner of the tray click on the upward arrow icon and right-click on the green Panopto logo to open the menu.